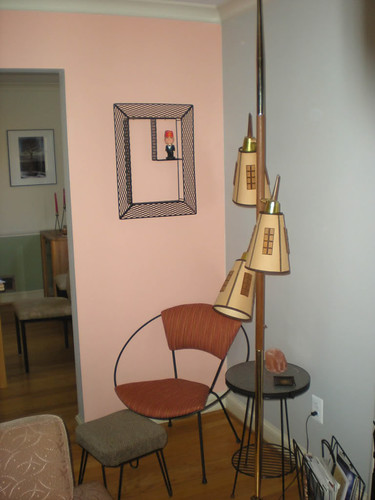
If you've been reading this blog for a while, you probably know I've been looking for a really over-the-top, gaudy shadowbox to hang on the wall here at the Uncle Atom crib.
Well, the planets finally aligned. A few days before we were set to leave for Chattanooga and the World's Longest Yard Sale, I spotted this great shadowbox on that auction site.
The price was not ridiculously low, but it also wasn't ridiculously high. The seller was willing to work with the buyer on shipping but preferred the item to be picked up. That's understandable, because it's easy for one of these beauties to be damaged in shipping, with all of the glass and mirror pieces and fragile moldings.
Luckily, I noticed that the seller was within a couple of hours of Chattanooga. So, I pulled the trigger and bought it. The seller was great to deal with, and as we were starting the Yard Sale, we already had the shadowbox in the back of our car. Anything else found at that point was simply gravy, or icing if you prefer.
Originally I wanted to have a shadowbox to go behind our bar in the basement Rumpus Room, but as you may remember, there's now a huge 8-foot Man From U.N.C.L.E. banner there. So, the shadowbox needed to go upstairs into the living room.
I had this heavy mid-century mirror hanging above the fireplace (I'm guessing it's from the early 1950s). We now have it up for sale at a local consignment shop. Whatever we make on it will be gravy (or icing), because I had picked up the mirror at a country auction years ago for about $5.
If you look carefully at the first picture above, you'll see the ugly wire holding the shadowbox against the wall. Well rest assured dear reader, I fixed that problem. The wire is gone and the shadowbox now hangs on two reinforced screws using the original hooks on the back. No ugly wire now.
Now that it's safely in its new home, I'm starting to look around for stuff to display on the shelves. Any ideas? I'll probably try to dig up some more vintage bobblehead nodders.
This shadowbox was made by the Illinois Molding Company, as noted on the back.
And.....it's celebrating a birthday this week!
If you want to see some more great shadowboxes, check out my Flickr photo group for mid century shadow boxes. And hey, if you have photos of other great shadowboxes, how about sharing them in this group on Flickr?
Showing posts with label shadowbox. Show all posts
Saturday, August 11, 2012
Saturday, January 28, 2012
Filling up the wall behind our mid-century bar
Well, I didn't find any other good mid-century things in New Orleans after my last post from the city, but I did have a great time there. (At least from what I remember).
Now that I'm back home, I'm catching up on stuff like laundry, etc. After a run to the dry cleaners and gas station today, I hit my local thrift/consignment store and picked up this paint by numbers Parrot.
It's in nice shape and came at a reasonable price.
I also visited a nearby antique store that's usually pretty sadly stocked, but in one shop I spotted my holy grail. Playing it cool, I asked the price and that required a phone call to the owner, who said it's "Not for Sale!"
I know that drives us all nuts, doesn't it? Why display something in an antique store if it's not for sale?
So what was it?
A HUGE honking shadowbox - curio shelf like this one (The pictured shadowbox belongs to froggyboggler, on Flickr, and can be found in my Mid Century Shadow Box group). The one I saw also has two lamps behind the planters. It's the first gaudy one like this that I've seen in our area.
I left my business card and an offer for it, so maybe I'll get a call back.
In the meantime, I've put up some black iron shelves and this metal shadowbox near the bar. The Elvis bust, Shriner nodder, and Fezmingo (thanks Amber!) seem more at home by the bar, and she who must be obeyed is a lot happier that these guys are no longer in the living room.
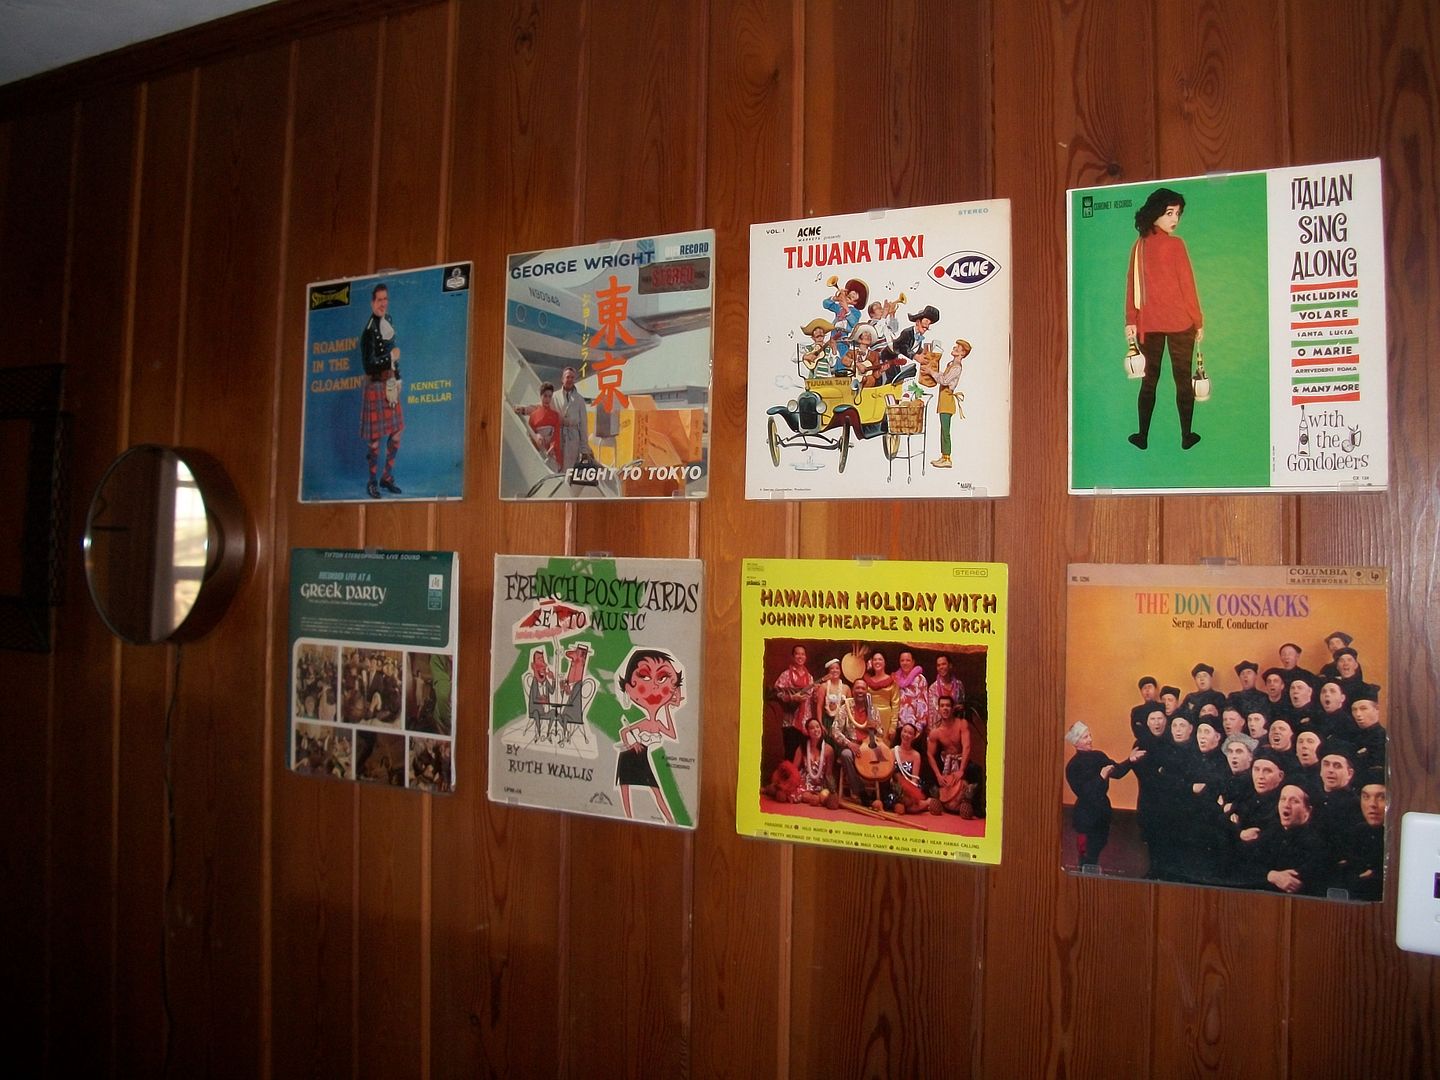
I've also added some records to the wall,
and my Infinity Mirror.
It's straight out of the 1970s and not what I usually collect, but it's just too cool not to display. I posted a pic of this on the Uncle Atom Facebook page recently, and there you can also see the original box this came in.
So, the search continues for a shadowbox to hang behind our bar in the basement.
--------------
If you haven't entered my giveaway yet, time's a wastin' - The contest closes on Feb. 3. You can find details at the giveaway link.
Now that I'm back home, I'm catching up on stuff like laundry, etc. After a run to the dry cleaners and gas station today, I hit my local thrift/consignment store and picked up this paint by numbers Parrot.
It's in nice shape and came at a reasonable price.
I also visited a nearby antique store that's usually pretty sadly stocked, but in one shop I spotted my holy grail. Playing it cool, I asked the price and that required a phone call to the owner, who said it's "Not for Sale!"
I know that drives us all nuts, doesn't it? Why display something in an antique store if it's not for sale?
So what was it?
A HUGE honking shadowbox - curio shelf like this one (The pictured shadowbox belongs to froggyboggler, on Flickr, and can be found in my Mid Century Shadow Box group). The one I saw also has two lamps behind the planters. It's the first gaudy one like this that I've seen in our area.
I left my business card and an offer for it, so maybe I'll get a call back.
In the meantime, I've put up some black iron shelves and this metal shadowbox near the bar. The Elvis bust, Shriner nodder, and Fezmingo (thanks Amber!) seem more at home by the bar, and she who must be obeyed is a lot happier that these guys are no longer in the living room.
I've also added some records to the wall,
and my Infinity Mirror.
It's straight out of the 1970s and not what I usually collect, but it's just too cool not to display. I posted a pic of this on the Uncle Atom Facebook page recently, and there you can also see the original box this came in.
So, the search continues for a shadowbox to hang behind our bar in the basement.
--------------
If you haven't entered my giveaway yet, time's a wastin' - The contest closes on Feb. 3. You can find details at the giveaway link.
Wednesday, June 29, 2011
Recent flea market and online finds
I'm looking forward to going to the flea market Saturday, and maybe I'll have some new pickups to post this weekend. For now, here are some recent pickups I haven't posted about:
Small moai tiki guy - I spotted this in a box of stuff, got it with a few other smalls for a few bucks.
He had some scratches and looked dull and dirty (happens to the best of us), but a little Murphy's Oil Soap and some Old English spray wax and this guy is standing tall and ready for his eventual new home on the dash of my Comet station wagon!
Got a pair of these great ashtrays, one has a small chip, but the pair were only $10. Sold!
Wait, what's that very cool looking angular thing above the ashtray on the end table?!?
Oh, that's my new Honeywell barometer! Sweet, huh?
I was looking for another vintage honeywell thermometer and ran across this - it was a steal.
I walked past this table at least once before I even saw noticed it because it was disassembled. I haven't put anything on it yet - was thinking about putting the Predicta TV there once I have it restored, but I think the table is just a little too tall. I'm sure I'll find something to put there.
The formica top and the brass edging and black legs make it a pretty close match to the end tables and coffee table in our living room - the new table was another nice deal at $25.
You know I have a shadowbox fixation, so when I spotted this long lost cousin to my other angular shadowbox in an online auction I grabbed it. I'm working on fixing some missing areas of paint but should have it hanging next to our other one pretty soon.
Small moai tiki guy - I spotted this in a box of stuff, got it with a few other smalls for a few bucks.
Wait, what's that very cool looking angular thing above the ashtray on the end table?!?
Oh, that's my new Honeywell barometer! Sweet, huh?
I was looking for another vintage honeywell thermometer and ran across this - it was a steal.
I walked past this table at least once before I even saw noticed it because it was disassembled. I haven't put anything on it yet - was thinking about putting the Predicta TV there once I have it restored, but I think the table is just a little too tall. I'm sure I'll find something to put there.
The formica top and the brass edging and black legs make it a pretty close match to the end tables and coffee table in our living room - the new table was another nice deal at $25.
You know I have a shadowbox fixation, so when I spotted this long lost cousin to my other angular shadowbox in an online auction I grabbed it. I'm working on fixing some missing areas of paint but should have it hanging next to our other one pretty soon.
So what could be waiting for me Saturday morning? The guy I bought the ashtrays from said he would be back with more mid century stuff, so I have high hopes. If I don't find much, maybe by then I'll have my gas tank problem fixed on the Comet.
Saturday, September 11, 2010
My Street Address? The Shadow(box) Knows! Mwaa Ha Ha Ha [UPDATED]
Finally I have a new post, and it's a project I think you'll like!
I've never cared for the address numbers in front of our house - they're boring.
And they're kinda hidden behind the porch light - which also is boring (I'm on the lookout for a replacement light). So when I needed to take a break this week from the patio wall footer forms I'm breaking my back building, I finally figured out what I wanted to do for a street address sign.
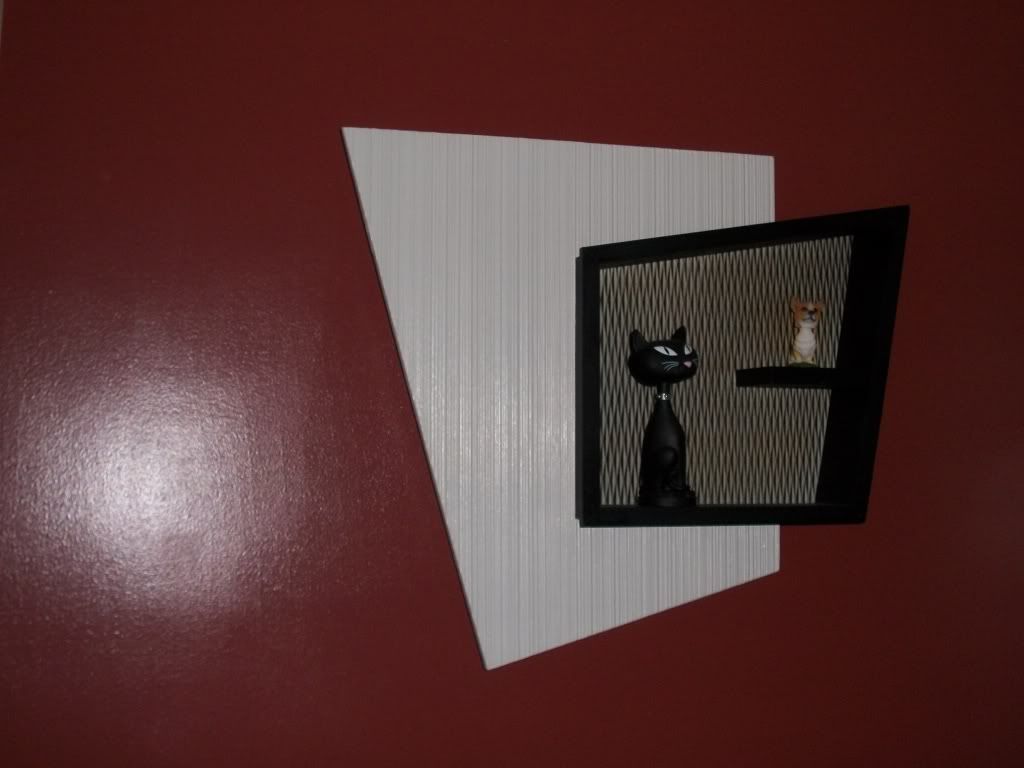
I took my inspiration from the small shadow box you see in at the top of this blog.
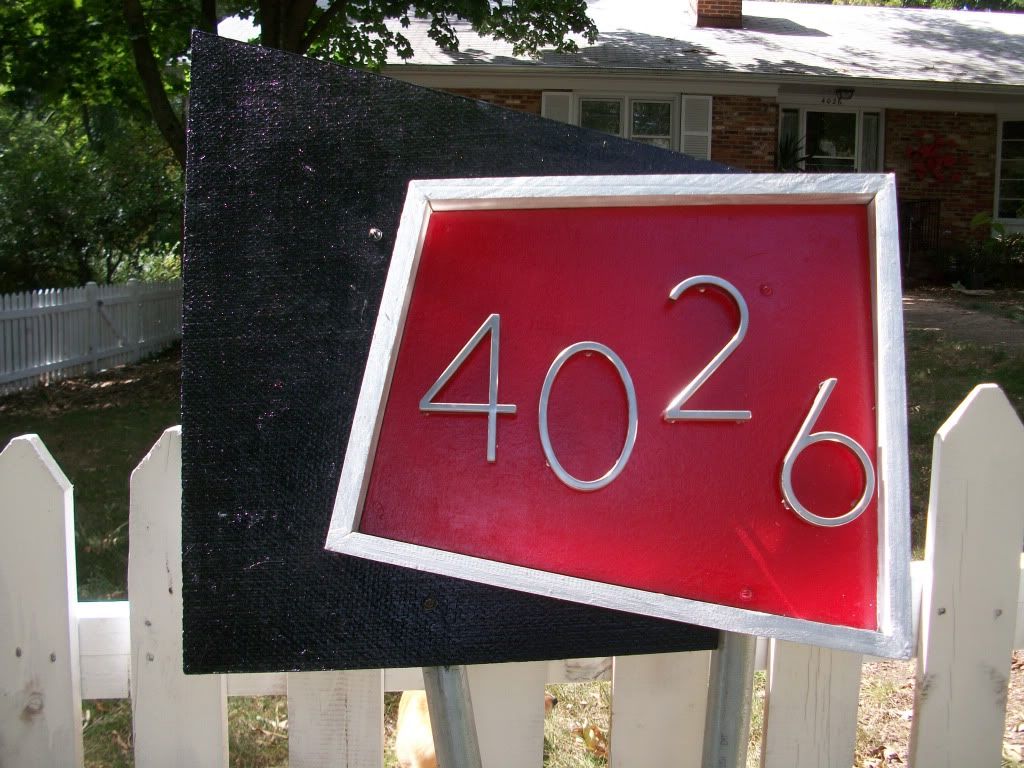
So what I needed was the right materials to use outdoors. I had a piece of cement backer board, the kind of material you use in a bathroom remodel. The numbers are from a big box store. I liked them because you can mount them flush or have them float.
I wasn't sure how big to make the shadow box, so I worked backward from the numbers - I knew I needed enough room to mount four numbers, so I established that minimum width and then started measuring and drawing pencil lines on the cement board.
I have a miter saw and a table saw, so I figured I could use one or the other to cut angles to frame the address area with some treated pine. For paint, I used some leftover Rustoleum gloss red and black, and bought a can of silver. I did the best I could with cutting the angles for the frame, but it was tough because a couple angles needed to be greater than 45 degrees, and that's the limit for the blade adjustment. Cutting angles has always been the hardest thing for me, but this time I got them close and used some plastic wood patch to fill in where I ended up with gaps where the angles meet.
Once I had the two pieces of cement board cut I painted them. After they were dry, I used some small nails to attach the two pieces together. (I flipped the red piece after I shot this photo, as you'll see below)
Then I glued the pieces of the frame together and glued them down to the cement board too. Using a small drill bit, I carefully drilled starter holes in the corners of the frame and tapped in some more small nails to hold the frame together.
Next I figured out how long I need to make the 1 1/2 inch conduit pipe, and I cut those pieces. Then I decided where I would attach the pipe to the sign and marked the pipe. Using my drill press, I drilled holes through the pipe pieces - I had already bought some bolts long enough to go through the pipe and the cement board, so next I lined the pipe up behind the shadow box and drilled through the holes in the pipe to get the holes exactly where I needed them through the cement board.
At first I figured I would orient the pipes so they were parallel, but then I realized it would look much better with them angled.
Once I got the pipes mounted to the shadow box, I needed to do some touch up with the paint to cover the bolt heads and some other areas on the front of the sign that needed touching up.
Finally, I was ready to put the numbers on the sign. They lined up pretty easily, so next I drilled small holes to float the numbers inside the framed area. The directions said to use clear caulk to hold the numbers in the holes, but after the caulk dried I knew I had to do something more to make sure the numbers would stay in place. I used some epoxy and some washers and that seems to have done the job. (As you can see in the photo, I still need to use some silver to cover up the black epoxy, just because it will drive me nuts to look at the back of the sign from the house and see those black dots there!).
The only thing I didn't get done was to run a piece of aluminum channel around the edge of the black area. The cement board is 3/8 inch thick, and I found a piece of 3/8 inch aluminum channel which I planned to cut and bend around the corners of the black area, but the channel would not squeeze onto the cement board and I didn't want to force it. So I'll keep an eye out for wider channel, or another solution to give the black area a slightly more finished look.
It's not a blinking, neon, Googie sign, but SWMBO already told me no neon, so this will have to do ;-)
Why don't I have a finished photo? Right now I'm just struggling to get the darn hole dug. I've gotten down about a foot, but the ground is so dry and hard the next foot is going to be a bear to dig out. I soaked it with water, and the water has not seeped into the ground at all. So I wait. Anyway, once it's deep enough, I'll cement the poles into the hole and brace the sign until the concrete sets up. I'll update this post when I have a photo of it in the ground
I went back to the big box store and bought three 80 pound bags of concrete mix, and I also discovered a piece of J-channel flashing with a 3/8 inch gap, so with tin snips I fitted the J-channel around the black part of the sign and tacked it on with a couple of tiny nails. I think I'll also drill a couple of holes up from the bottom of the wood shadow frame's bottom piece so that snow/ice will have a way to not build up in the frame and hasten the wood rot process I know I'll have to eventually deal with.
With the help of a big iron digging bar, I got down far enough to position the sign and add concrete mix and water. The toughest part was leveling it - with all the angles, the only "level" element was the bottom of the numbers, so I went by that. The concrete set up overnight so I removed the wooden braces and stakes I had to hold it steady, and covered the top of the hole with dirt. It's rainy this morning so I didn't get a great photo, but I'll shoot some more when things brighten up.
I have to say, while it's not perfect, I'm mighty happy with the way this project turned out. I'll have to wait and see how the shadow box holds up after it endures rain, ice, snow, and sunlight.
I've never cared for the address numbers in front of our house - they're boring.
And they're kinda hidden behind the porch light - which also is boring (I'm on the lookout for a replacement light). So when I needed to take a break this week from the patio wall footer forms I'm breaking my back building, I finally figured out what I wanted to do for a street address sign.
I took my inspiration from the small shadow box you see in at the top of this blog.
So what I needed was the right materials to use outdoors. I had a piece of cement backer board, the kind of material you use in a bathroom remodel. The numbers are from a big box store. I liked them because you can mount them flush or have them float.
I wasn't sure how big to make the shadow box, so I worked backward from the numbers - I knew I needed enough room to mount four numbers, so I established that minimum width and then started measuring and drawing pencil lines on the cement board.
I have a miter saw and a table saw, so I figured I could use one or the other to cut angles to frame the address area with some treated pine. For paint, I used some leftover Rustoleum gloss red and black, and bought a can of silver. I did the best I could with cutting the angles for the frame, but it was tough because a couple angles needed to be greater than 45 degrees, and that's the limit for the blade adjustment. Cutting angles has always been the hardest thing for me, but this time I got them close and used some plastic wood patch to fill in where I ended up with gaps where the angles meet.
Once I had the two pieces of cement board cut I painted them. After they were dry, I used some small nails to attach the two pieces together. (I flipped the red piece after I shot this photo, as you'll see below)
Then I glued the pieces of the frame together and glued them down to the cement board too. Using a small drill bit, I carefully drilled starter holes in the corners of the frame and tapped in some more small nails to hold the frame together.
Next I figured out how long I need to make the 1 1/2 inch conduit pipe, and I cut those pieces. Then I decided where I would attach the pipe to the sign and marked the pipe. Using my drill press, I drilled holes through the pipe pieces - I had already bought some bolts long enough to go through the pipe and the cement board, so next I lined the pipe up behind the shadow box and drilled through the holes in the pipe to get the holes exactly where I needed them through the cement board.
At first I figured I would orient the pipes so they were parallel, but then I realized it would look much better with them angled.
Once I got the pipes mounted to the shadow box, I needed to do some touch up with the paint to cover the bolt heads and some other areas on the front of the sign that needed touching up.
Finally, I was ready to put the numbers on the sign. They lined up pretty easily, so next I drilled small holes to float the numbers inside the framed area. The directions said to use clear caulk to hold the numbers in the holes, but after the caulk dried I knew I had to do something more to make sure the numbers would stay in place. I used some epoxy and some washers and that seems to have done the job. (As you can see in the photo, I still need to use some silver to cover up the black epoxy, just because it will drive me nuts to look at the back of the sign from the house and see those black dots there!).
The only thing I didn't get done was to run a piece of aluminum channel around the edge of the black area. The cement board is 3/8 inch thick, and I found a piece of 3/8 inch aluminum channel which I planned to cut and bend around the corners of the black area, but the channel would not squeeze onto the cement board and I didn't want to force it. So I'll keep an eye out for wider channel, or another solution to give the black area a slightly more finished look.
It's not a blinking, neon, Googie sign, but SWMBO already told me no neon, so this will have to do ;-)
I went back to the big box store and bought three 80 pound bags of concrete mix, and I also discovered a piece of J-channel flashing with a 3/8 inch gap, so with tin snips I fitted the J-channel around the black part of the sign and tacked it on with a couple of tiny nails. I think I'll also drill a couple of holes up from the bottom of the wood shadow frame's bottom piece so that snow/ice will have a way to not build up in the frame and hasten the wood rot process I know I'll have to eventually deal with.
With the help of a big iron digging bar, I got down far enough to position the sign and add concrete mix and water. The toughest part was leveling it - with all the angles, the only "level" element was the bottom of the numbers, so I went by that. The concrete set up overnight so I removed the wooden braces and stakes I had to hold it steady, and covered the top of the hole with dirt. It's rainy this morning so I didn't get a great photo, but I'll shoot some more when things brighten up.
I have to say, while it's not perfect, I'm mighty happy with the way this project turned out. I'll have to wait and see how the shadow box holds up after it endures rain, ice, snow, and sunlight.
Sunday, August 1, 2010
More on Shadowboxes
One of the things I like most about kitschy atomic furnishings is the shadow box.
I really like the small shadow box that you can see in the Uncle Atom banner, and we also have a cool wire mesh shadow box, but I still haven't found the over-the-top mirrored shadow box of my dreams.
Until I do, I pine away and sigh frequently, collecting photos of ones I run across and bookmarking online ads even when they're too far away to make shipping possible or realistic. I may have to try making one some day, but I'm the first to admit that I'm awful at making angled cuts in pieces of wood and even worse at getting those angles to join together and not have an ugly, gaping mess when I'm done.
Anyway, here's a link to a Flickr group I started for mid century shadow boxes. Feel free to join the other eight of us and add your photos if you have any.
Saturday, April 3, 2010
Home Again Home Again
Well, after a 13-hour "long march from hell" drive yesterday, we made it home. The car couldn't hold any more stuff and along with two adults, a surly 15-year-old with a broken ankle, a neurotic old beagle/basset and a corgi, it was quite the journey. We did a couple of brief stretches on the Blue Ridge Parkway which is always a nice way to travel and enjoy the scenery. The down side was, a couple of areas of the road were closed due to so much winter tree damage impacting the road yet. And to top it off the "check engine" light was on and the Volvo was not liking the high altitudes and frequent switchbacks on the roads we were taking. Anyway, we finally made it home. I managed to drag myself out of bed for the big event of Saturday morning, the first monthly flea market put on by the Arlington Civitan Club. It's my favorite flea market, held every first Saturday between April and November, so the stretch between December and March is kinda hard to bear.
So today I made the rounds of about 120 vendors ,and managed to come away with some pretty good shtuff!
Here it is --
So today I made the rounds of about 120 vendors ,and managed to come away with some pretty good shtuff!
Here it is --
Two tiki mugs (the one on the left is a mermaid) for $1, and a vintage Indian blanket ($5) that will work great on the front seat of my 63 Comet wagon until I get around to having it reupholstered.
Next I found this great pair of twin bed head boards ($15 for the pair!!!) The seller has vintage textiles (table cloths, curtains, etc.) and she said the head boards were her brothers when he was growing up.
The booth next to the seller of the head boards made me a great deal for the shadowbox and coffee table ($35 for the pair)
Finally, when I bought the Indian blanket I also got a book for the surly teen, who is discovering the Beatles. It's a book about the group's recording sessions. So when I asked what the guy wanted for this item, he threw it in for free with the blanket and book. I am guessing it's a finial for a lamp. It's about six inches tall and the sides are made of that opaque parchment material found on so many vintage lamp shades. I can't tell if it's fiberglass or something else. I've never seen one of these -- pretty cool, huh?
Next month I'm hoping I'll be able to get my act together and be a seller at the Civitan flea market. I have to move some stuff to make room for other future treasures and to raise some cash for ongoing car and camper restoration needs.
Sunday, February 7, 2010
Shadow box project
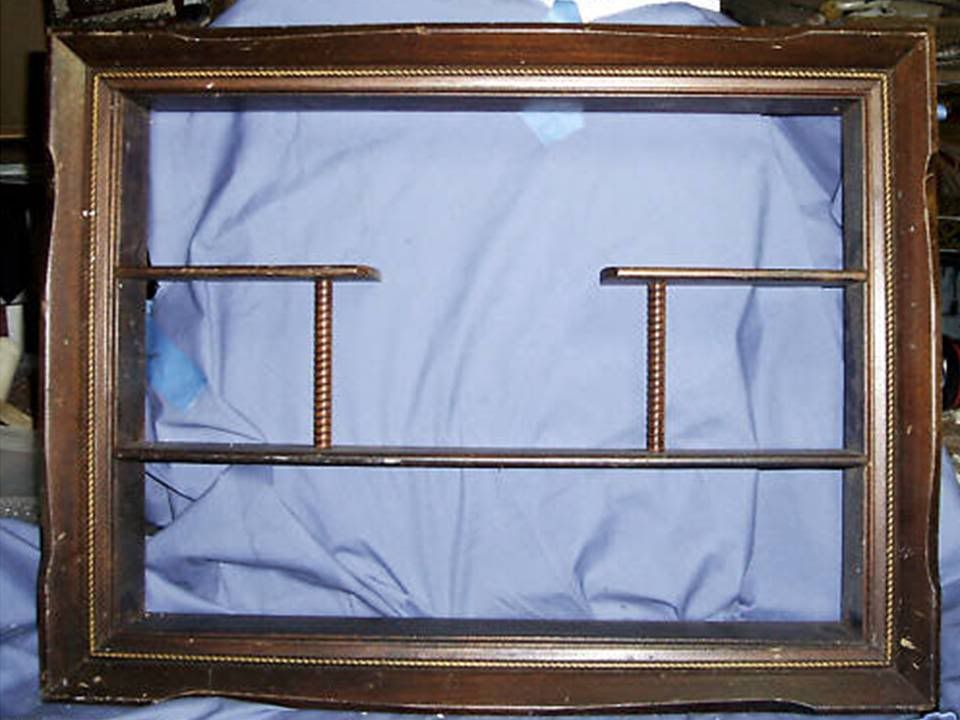
In an older post I showed off a cheap vintage shadow box I found on ebay. Here's the BEFORE photo:
I bought it before the holidays and it took forever before I finally got it. It's been sitting for a few weeks now while I looked around for some appropriate wood molding to turn it into a wild 50s style shadow box. So I'm giving up on that search and I'm going to paint this and get a mirror for the back and use it.
After sanding it with some 220 grit sandpaper to smooth over some scratches and nicks, I primed it with some rattle can primer.
Here it is with the primer applied:
I bought it before the holidays and it took forever before I finally got it. It's been sitting for a few weeks now while I looked around for some appropriate wood molding to turn it into a wild 50s style shadow box. So I'm giving up on that search and I'm going to paint this and get a mirror for the back and use it.
After sanding it with some 220 grit sandpaper to smooth over some scratches and nicks, I primed it with some rattle can primer.
Here it is with the primer applied:
It looks a lot better already! I'm thinking about either painting it all gold, doing the accent in gold and the rest in white, or leaving it gray. All I need to do to finish it is get a mirror cut for the back and add a thin piece of plywood to hold the mirror in place. I'll do an update when I'm done.
Sunday, December 27, 2009
shadow box ebay find
I couldn't pass this up for $12 plus shipping.
I'm on the fence about keeping it as is, or doing some modifications to give it the wild angular look of some other great shadow boxes you can see here. I picked up some wooden dowel rods and solid wood balls. If I can find some appropriate molding I may try for a bowtie shaped frame.
Subscribe to:
Posts (Atom)