

Since I have a nice template to add the starburst graphic and logo to the other unrestored Thermaster cooler (thanks again Amber!), I figured I would walk you through the process.
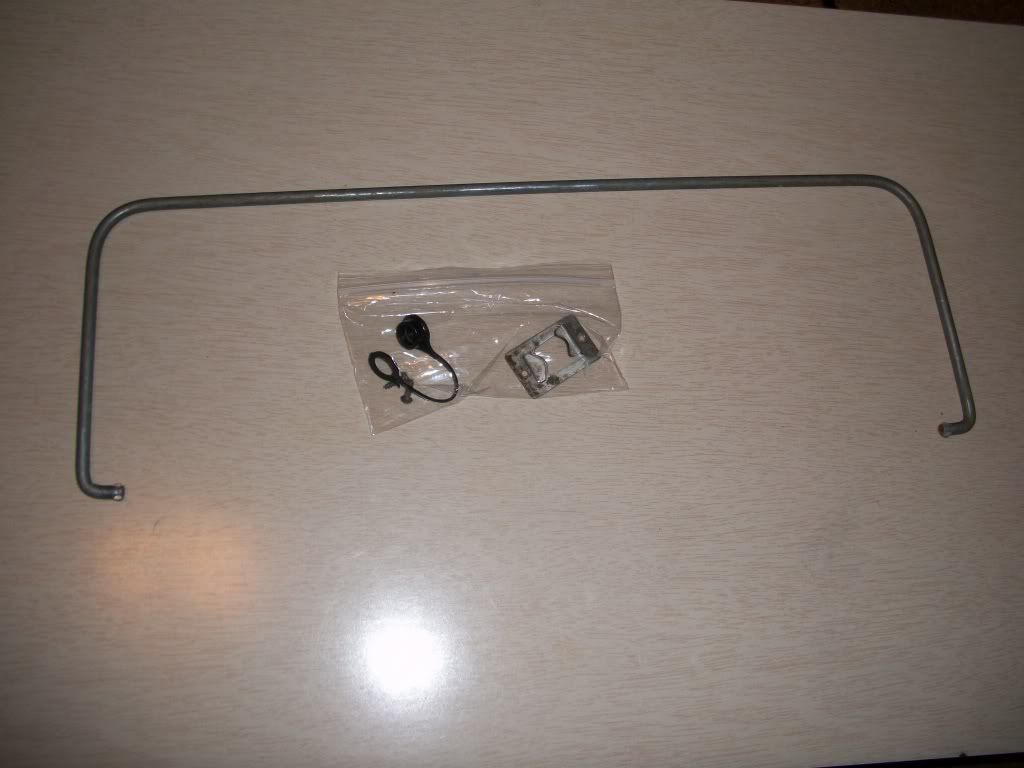
First the old paint has to come off. I removed the carrying handle (it pops out of two sockets easily), and the other pieces that don't get painted. All I needed was a flathead screwdriver, and a ziplock bag to save the parts in for reassembly later.
Next I got a cheap paint brush and this orange paint stripper. It works pretty good.
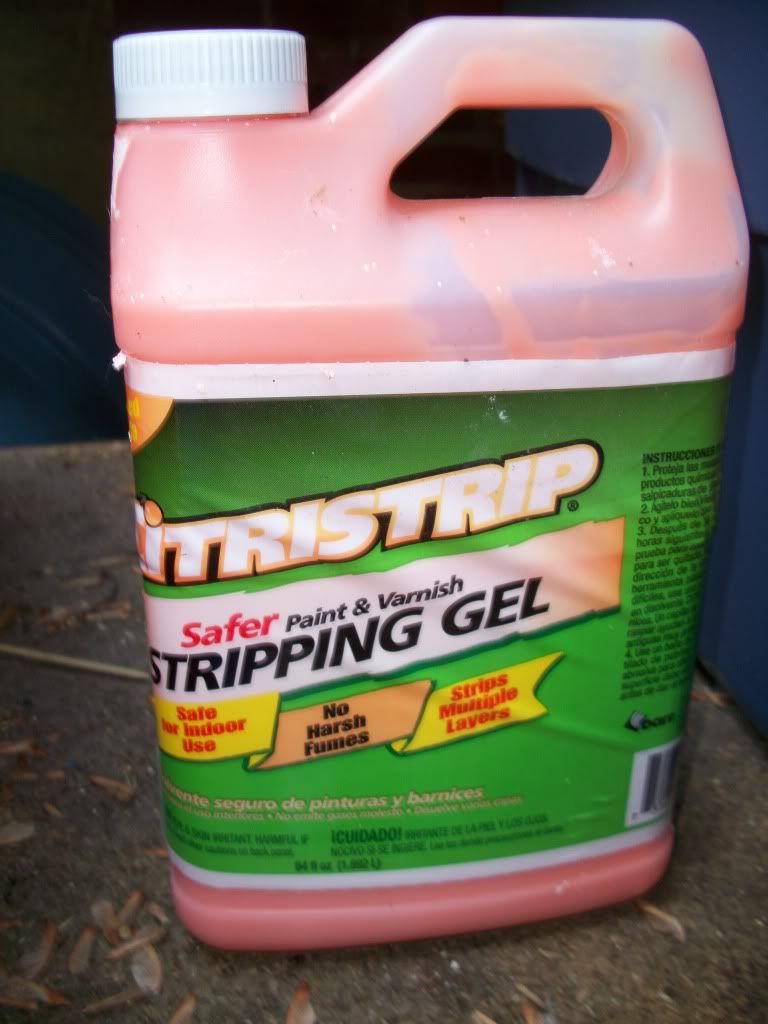
Brush it on and let it soak into the paint. Then take a razor blade and scrape off the orange stuff and the old paint. Sometimes it takes a second coat of the orange paint stripper to get the stubborn parts.
Next, get some medium grade and fine grade steel wool to rub off the last of the paint.
Once that's done, I like to use some mineral spirits to wipe down the metal.
Next, use some spray primer to coat the area to be painted. Let the primer set up for at least an hour.
Then, lightly spray on two or three coats of paint, letting each coat dry well. I used an off white for the top, and orange for the cooler. The orange and green coolers together should have a mid century vibe.
Wet sand if you like, between coats to smooth out any grit from the paint. If you've never wet sanded, it's really pretty easy. Get some fine sandpaper (1000, 1500. and 2000 grit automotive sandpaper) from any auto parts store. Fill a small bowl with water, wet down the 1000 grit paper first and sand in only one direction over a small area. You don't need to press down hard, let the paper glide. Wet the paper very often and sand small areas. Don't press down hard, just glide over the surface. You're only trying to knock down rough spots left from the paint application.
When you've sanded all the areas you painted, wipe that all down again with the mineral spirits. If you think it's smooth enough, quit at that point. If you want to go further to see what higher grades of sanding will do, use the 1500 grit paper to wet sand further. Do this until you end up with a nice layer of paint that feels smooth to the touch.
Next I positioned the template for the logos, and masked off around the areas I didn't want to get the white paint on. It's important to let the paint cure for probably at least 36 hours before trying to remove the masking. I had to use a hair dryer to peel off the template, and unfortunately, some of the orange paint came with it. This kind of thing makes me crazy. Next I had to make sure the white logo area had cured for about 2 or 3 days, then I felt comfortable to carefully mask off the white to re-apply more orange in the areas that peeled up with the tape. I gave it a couple of light coats, then let that all cure. Then I taped off the other side of the star point where the paint peeled up, and repeated my steps. Tedious, I know. What I was left with was a reasonably good coverage everywhere, although a little of the white paint bled through in some tiny areas.
Since I had to mask and re-apply orange, it left me with some shadowing. The next tactic was to wet sand with a fine grain wet sanding sandpaper. Suffice to say, I screwed it up. I couldn't overcome the shadowing, and I couldn't mask off the white areas without driving myself crazy. So I punted and sanded down the white areas, and sprayed with more orange, then wet sanded again.
Luckily I had a backup set of the star and label vinyl so I carefully cleaned the surface and rubbed down the vinyl. Carefully peeling back the paper backing left a nice looking finished cooler. I'll give it a couple of coats of gloss clear paint to finish it out, after the clear cures, I;ll wax the whole thing. Here's the final outcome.
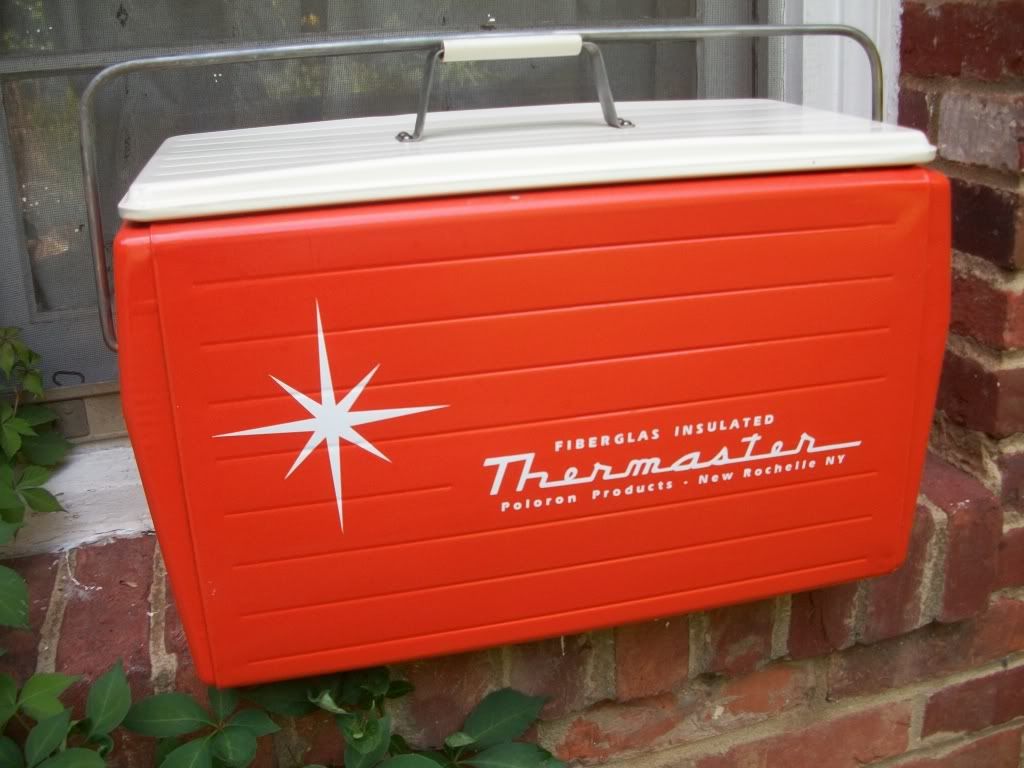
Overall, I would use the positive decals and skip the template/painted logo, it introduces more room for error and mistakes that need to be covered up later.
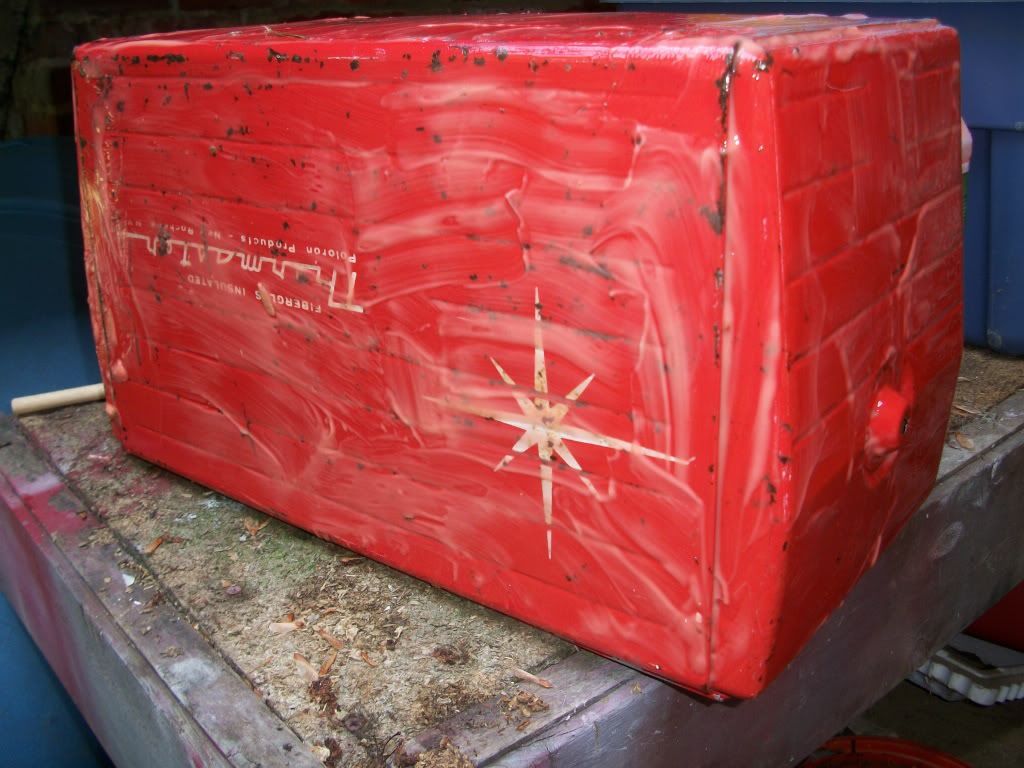
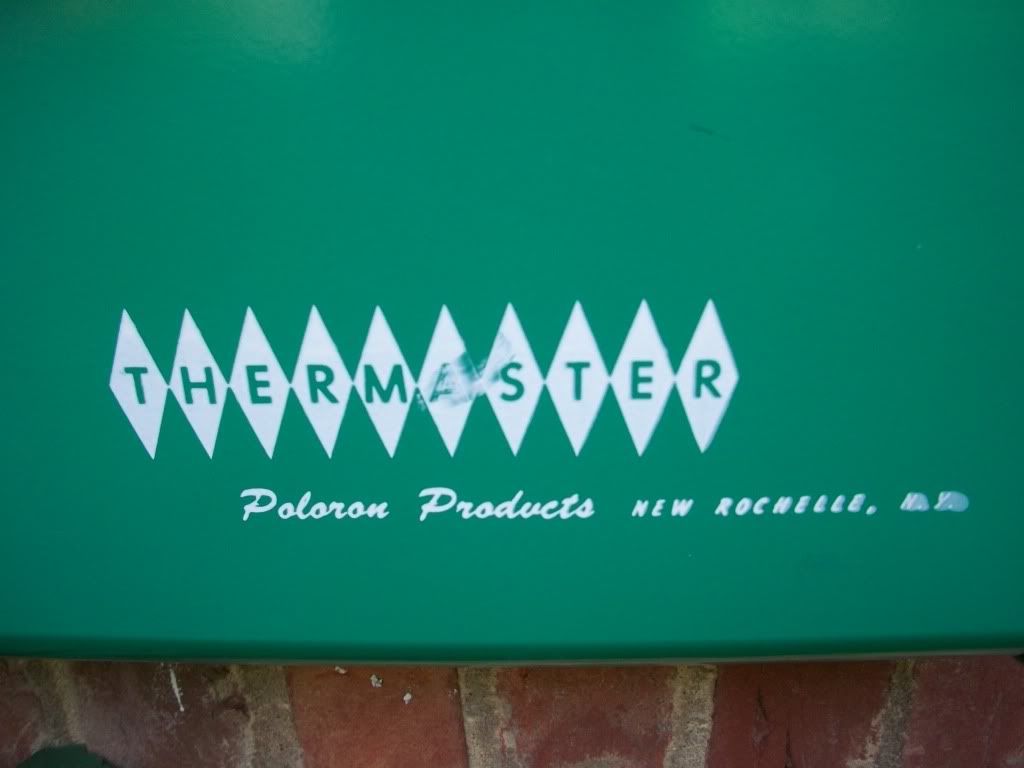
Oh, and while I'm on the subject, here's another Polaron cooler I picked up recently, the lid on this had been sat on, but I was able to remove the insulation under the lid and push the dented area back out. It's hard to notice it had a dent. The logo is smudged a little, but what the heck, it still looks great.

I couldn't have finished the orange cooler (or the earlier green one) without the help of a great fellow blogger who set me up with the vinyl graphics. So do the Uncle a favor, and start following I Heart Everything. You'll be glad ya did!
The coolers look great! Nice job
ReplyDeleteYou are brilliant!
ReplyDeleteWow wet sanding, never heard of it before, but I know it will come in handy. Thanks for the tip. They coolers looks fabulous
ReplyDeleteGod you are clever, I love projects like this and love that you're talking us through them too!
ReplyDeleteThanks for the comments. First time I wet sanded I was afraid I would make things worse, but if you use really fine grain wet-sanding paper and practice a little on something that can only be improved anyway, you'll find it's a great approach.
ReplyDeleteAw Uncle, thanks for the shout out! I love the finished product! Since you are clear coating it anyway, you really could have gone with the straight up decal vinyls. They look so great. Do they color coordinate with your cars or what? LOL!
ReplyDeleteJust purchased one of the Thermasater coolers that you restored. I love how your project turned out!! I was wondering if you had a source for the vinyl star and text. Thanks
ReplyDeleteIf you contact me through my profile I can send you a jpeg copy of the graphics I made, then any sign shop could laser cut the vinyl for you. Good luck with your cooler.
ReplyDelete