
Winter weather and moisture here in the East takes a toll on chrome


The front dinette cushions were there, but the rear 'gaucho' sofa/bed cushions were gone and the sliding bedframe had been turned into a permanent bed with an old mattress.
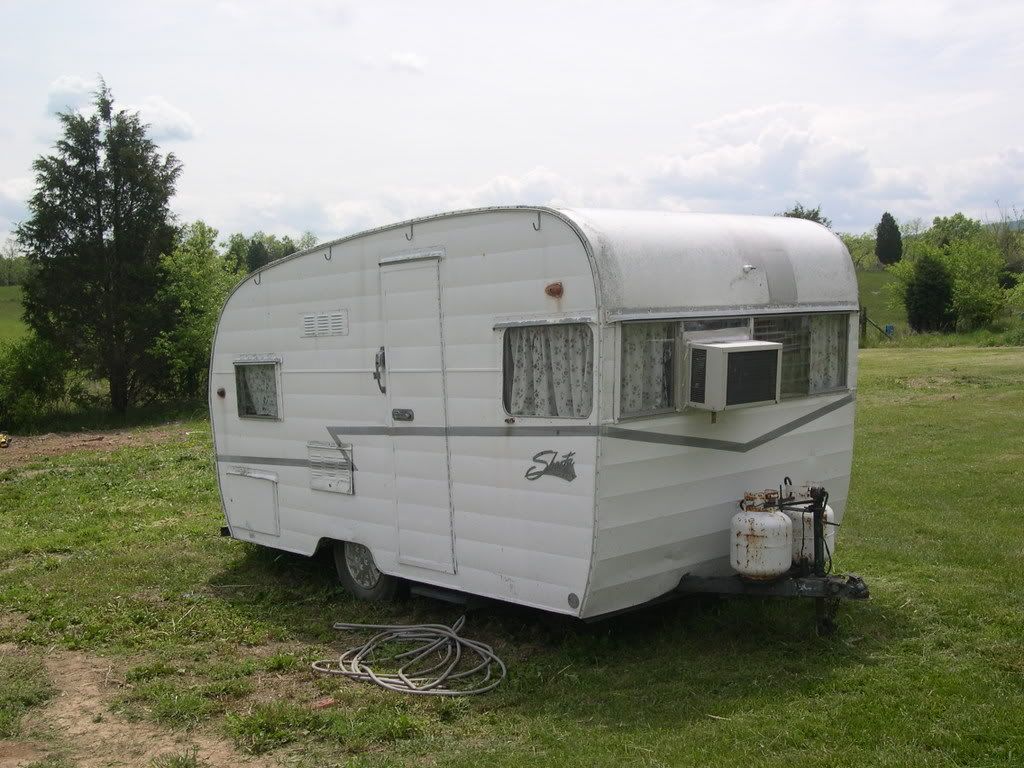
After looking it over and negotiating for a few days we struck a deal. It didn't have the original wings, but I figured I could find a set or build a set when the camper was done. We dragged it with my father-in-law's pickup to their driveway. There it sat for a couple weeks until I could get new trailer tires mounted on wheels that would fit. Finally I went back and after I repacked the wheel bearings I used my father-in-law's truck to tow it to a trailer repair business. I had them get the towing lights working and make sure it was safe to tow home.
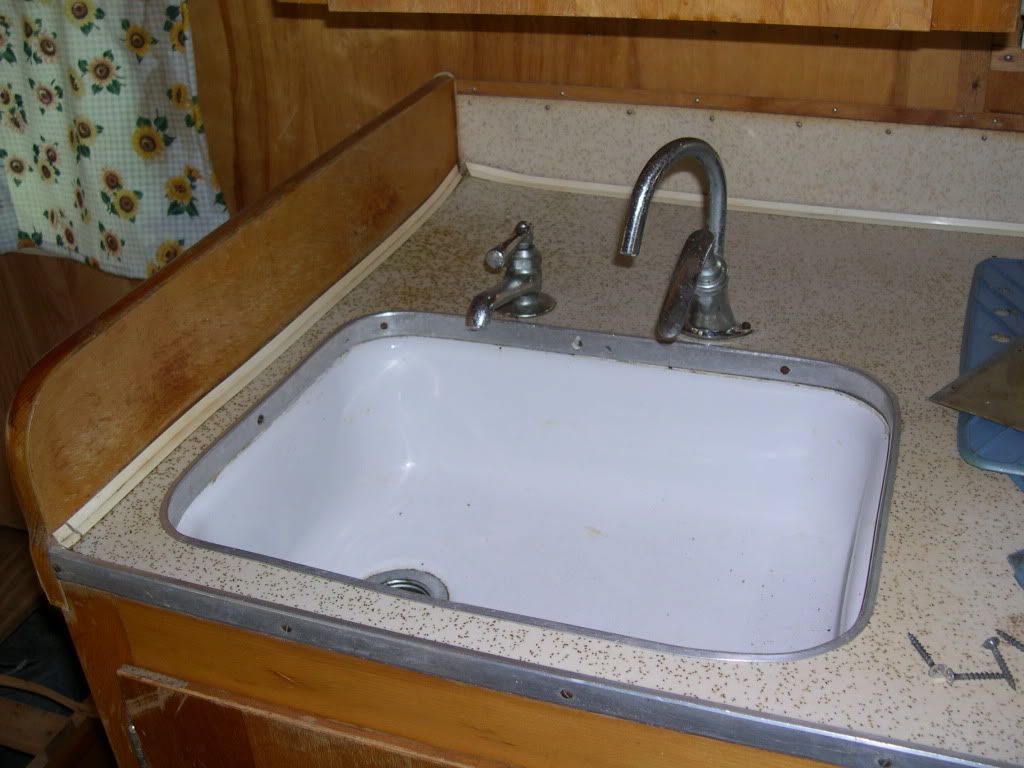

Another shot taken before restoration started. This is the electric light above the kitchen sink. The daisy curtains were saved and used as patterns for new curtains.

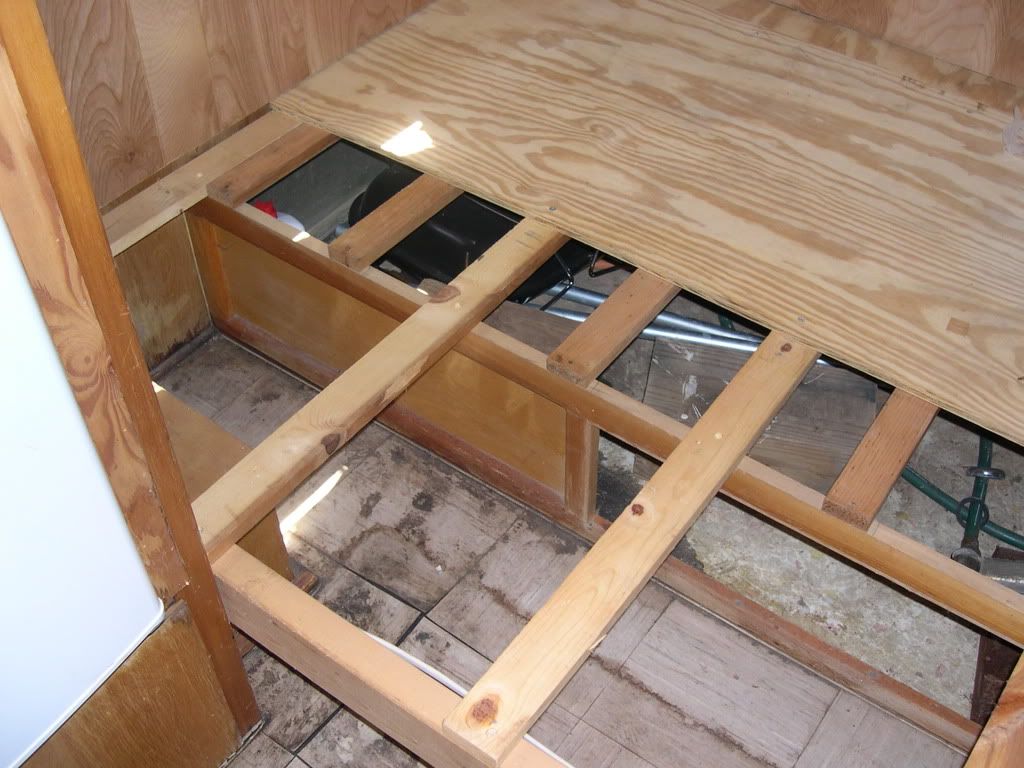
Here's how the permanent frame looked. It all came out when I began the rear exterior and interior work.
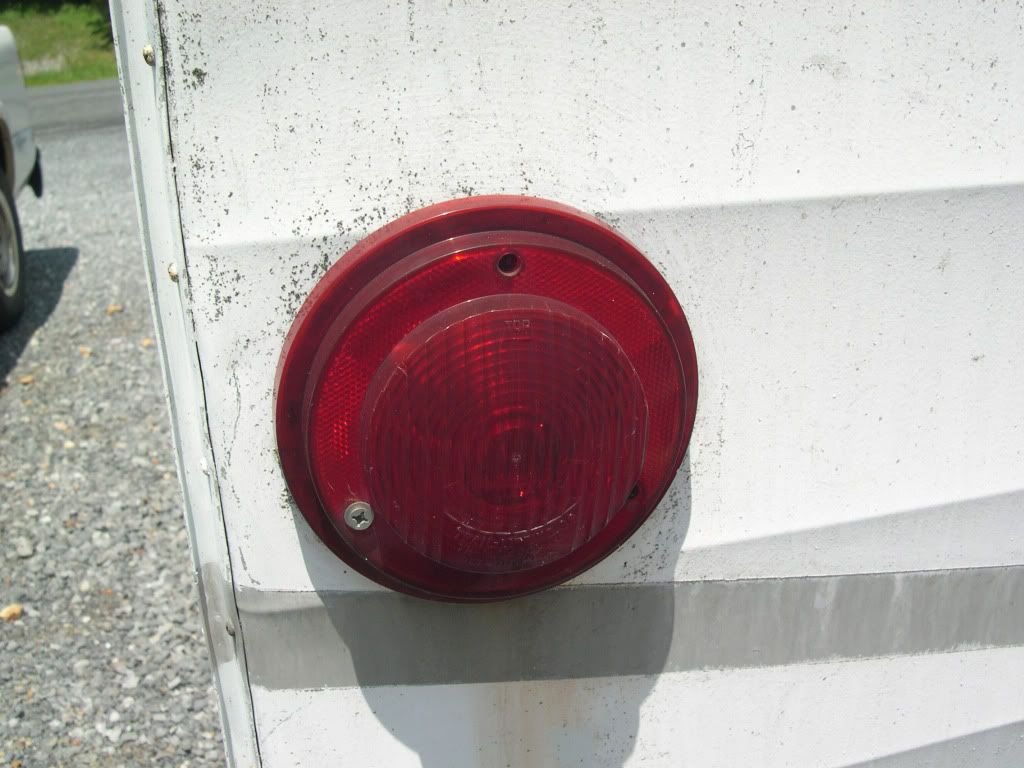
One of the taillights that were tossed out by the trailer repair dudes!
I started by stripping most of the old paint off the aluminum paneling.

Paint stripping underway. I used orange stripper and a razor scraper to get most of the paint off.
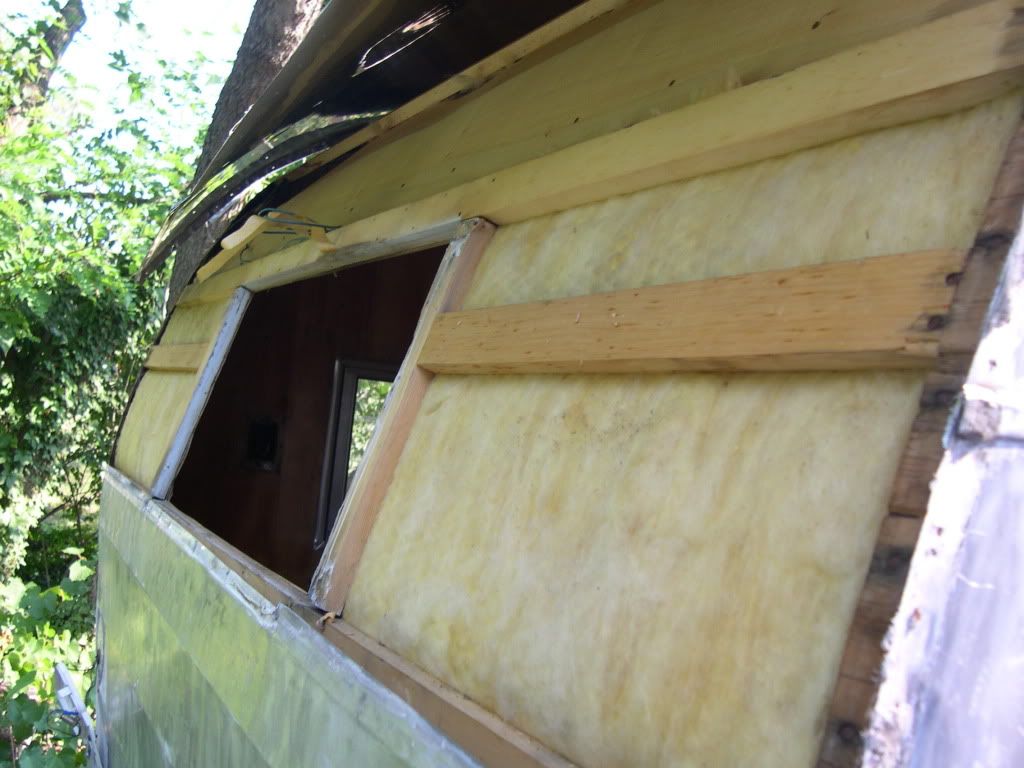
At the same time I was going through Shasta to decide what needed repair or replacement, and began looking online for missing parts and parts to replace or upgrade what came with the camper. Like nearly all old campers, this one had some water damage inside under windows where water had gotten in.
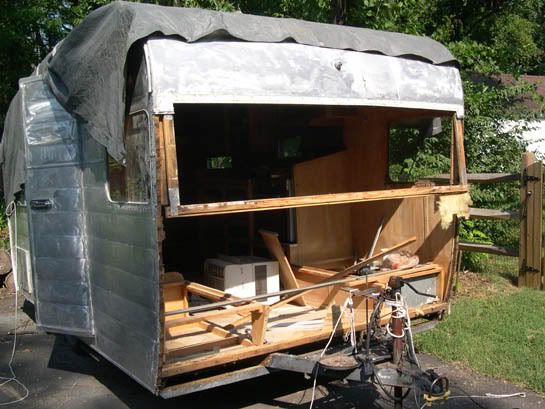
The more I learned about how the Shastas were built, the longer I took to get started. I realized I needed to take the exterior aluminum off to get to the framing because the interior paneling was attached from the outside to the frame, not from the inside. So, I figured I needed a week or two to get hundreds of screws out to remove the back end, get the bad wood paneling out, assess the frames condition, replace any rot, install new paneling and then re-attach the aluminum. And because I don't have a garage, I needed to have sunny weather, a big tarp, and lots of free time.
About a nine months after I dragged it home, I had finally located 1/8" birch paneling in 4'x8' pieces, I had the amber shellac, and I had the stainless sheet metal screws and the correct putty tape to seal around all windows and in the corners where the aluminum attaches to the frame. I got lucky when I had this area apart and did not have to replace much of the 1"x3" wood frame pieces.
Back window removed and first aluminum panel unscrewed and removed.

I can't locate any other photos of the rear end taken apart, but this shot shows the gaucho area after the paneling and new framing was in. The gaucho has two pieces of plywood underneath. To extend the frame out so the sofa cushions will fold out to make the bed, you just pull outward on the front piece of plywood.
I managed to get the rear end apart and back together in the time I allotted, and didn't have too many problems with the weather. I also rebuilt the wood framed door and got that all back together so that by the time my vacation was over, I had it all put together so it would weather any rainstorms. I held my breath the first time it rained, but luckily no leaks in the back end I had redone.

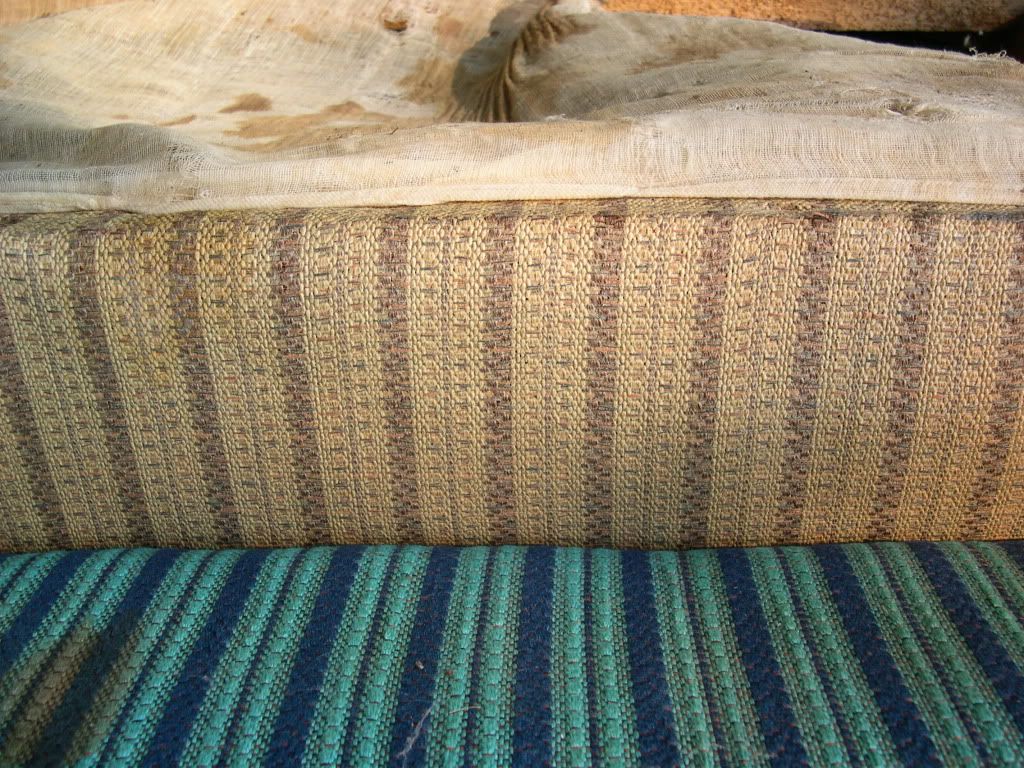
On the underside of the dinette cushions they used pieces of leftover upholstery, so these are examples of some of the original material used in the Shastas.
I also got the front dinette cushions reupholstered, but since I had to use my next vacation to redo the front of the camper, the dinette cushions spent nearly a year in the house.
The second major job was to repeat my previous work on the front of the camper. There were more windows to deal with and because someone had fitted a window air conditioner into the front dinette window, I had to not only remove that big window frame (all one piece and heavy!) but I had to take it to a glass center and get new glass installed.
Here's a shot of the front end work in progress.
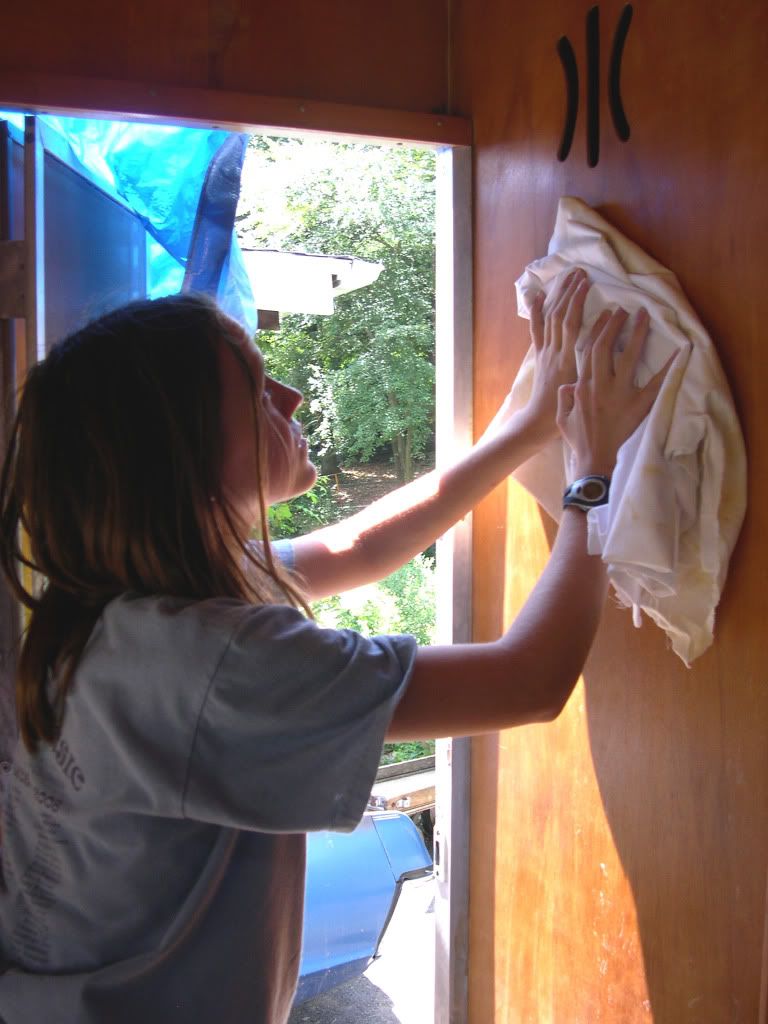
My teenage daughter was a big help for jobs that required two sets of hands.
Fortunately, I got everything apart, repaired, and back together again during another two-week window of summer.
With the front of the camper back together and the windows all back in and everything re-sealed, I got all the freshly shellacked drawers and cabinet doors back in. Next I got some vinyl flooring with a wood finish and installed that over the old asbestos tiles which were too far gone to bring back to life. At that point I took another break to plan exterior finishing and persuade my dear wife to take the fabric I had found and turn it into curtains.
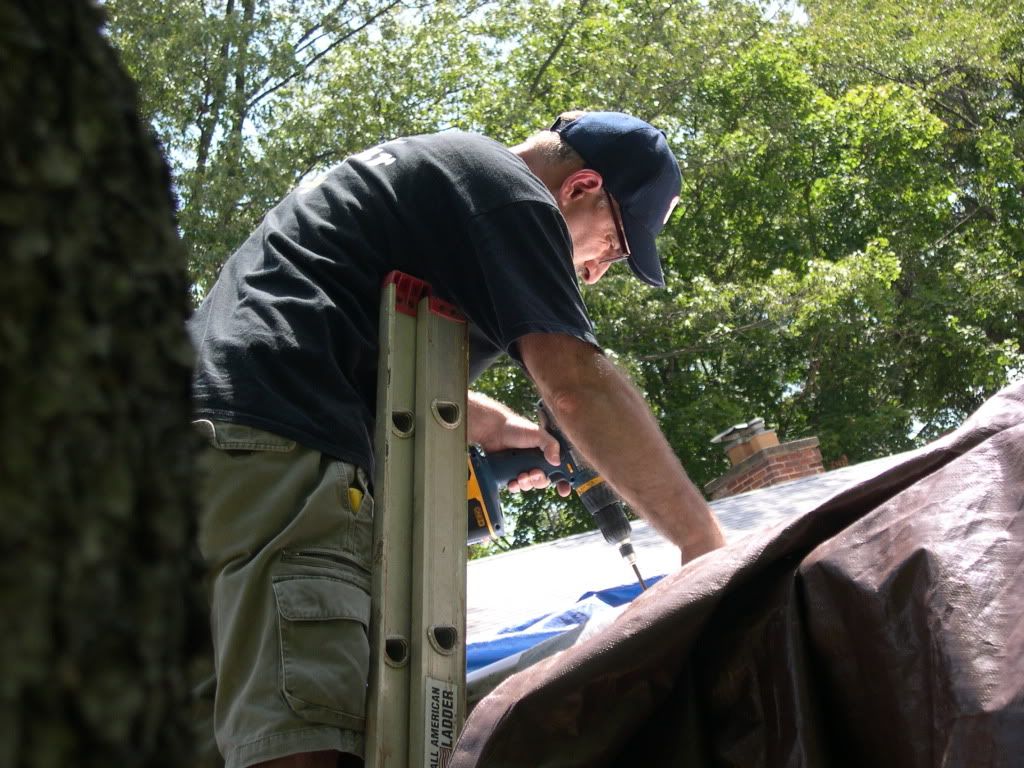
I also replaced the original roof vent with one that has a fan to move move air.
Last summer, I was finally ready to finish stripping off the old paint and get the Shasta ready for new paint. We wanted to go with an aqua/turquoise color down low which was close to one of the original Shasta colors, and for the top portion of the camper an off white. I had read a lot about people painting cars with Rustoleum and paint rollers. I figured I would give it a shot. First I used rattle cans to spray primer on the metal.
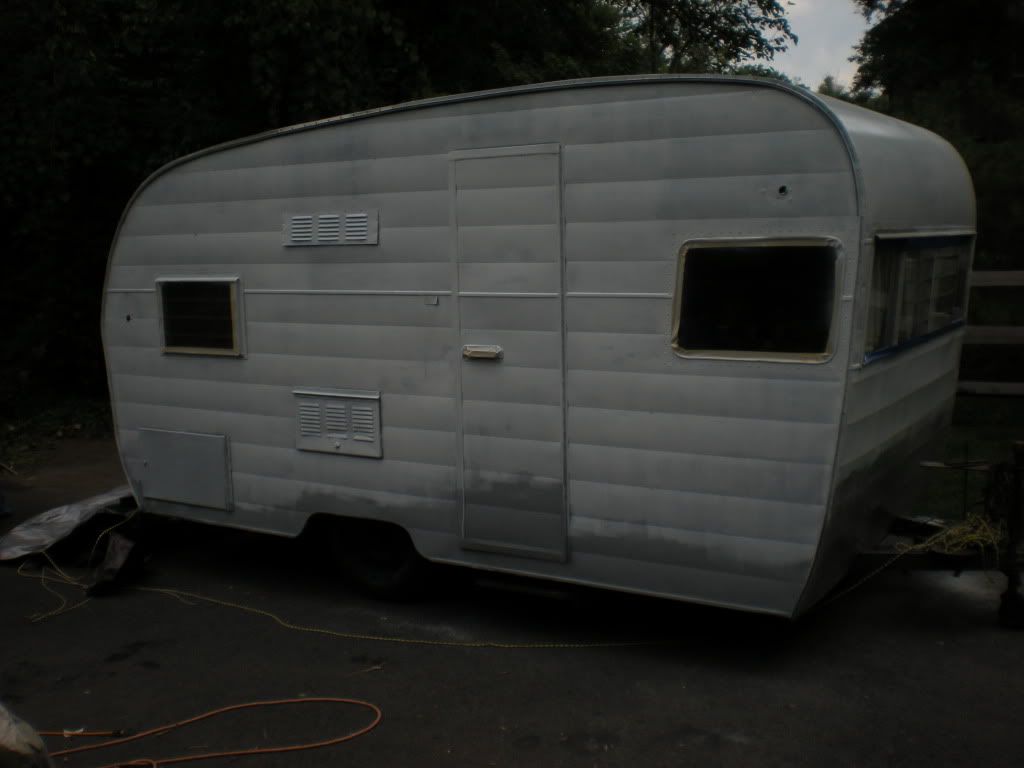
Here's a shot of the camper in primer. I smoothed out a few of the large dents but decided early on that I would leave the smaller dings alone and not shoot for perfection.
The green paint I used on the bottom was a tinted quart of white rustoleum (I had to practically beg the paint salesperson at the big box store to tint the paint since they are not supposed to tint rustoleum. No idea why, but after I promised that I would buy the can and not return it no matter what the result, I got my way.). The green went on just as easily as the white.
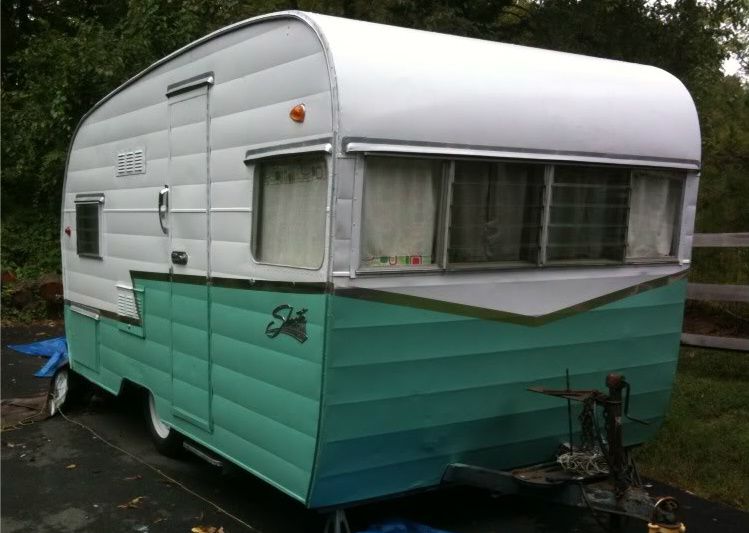
Here's where if I had it to do over again, I would have done one thing differently. Apparently the original Shasta Z-stripe was simply bare aluminum masked off when the camper was painted. I decided I would instead use aluminum tape to form the Z-stripe. Overall I think it turned out OK, but I ran into problems where the stripe crosses over the louvered vent. The tape didn't want to lay down between each louver. Still, I'm pretty happy with how the paint turned out, and it's a huge improvement over the way the camper looked before.
So now, I'm into the fourth year of work, but fortunately I only have a few things to do to be able to actually tow this Shasta to a campground site. More to come as I get time to work on the camper this spring.
Amazing! She's looking great! Nice work...
ReplyDeleteWOW! I am stoked to see you are doing the work yourself! I lot of people who I have met with "fully restored" versions are paying an arm & a leg to have some one else do it. Mine hasn't been out of the driveway for a few months. I actually rented it last summer to some folks to use on a campsite for three weeks. It make me $300 bucks! The farthest I have ever towed & camped with ours is up to Monterey, CA from Ventura CA. which is almost 900 miles one way! We camped at Big Sur on the way home, under the giant redwoods! I can't wait to get my wagon & trailer working together. It is my biggest dream! Thanks for sharing yours with us! I love it!
ReplyDeleteThanks for the compliments. None of the repairs are real hard, but you need some decent information about how the camper was built. From what little I have learned, the floor was built, the sides were built as slabs, and then they were propped up and the front, back and roof were attached. I've seen where some people have torn out the inside paneling and I guess they figured out a way to add more ribs so they would have something to attach the new paneling to. Look around online for some vintage camper forums - there's one over in my links list. It helps if you know the make and model of the camper so you can try to find someone else who has one or is familiar with it. It is supposed to warm up here in the DC area and get sunny starting tomorrow, so I hope to get the tarp off of it and get inside and shoot some more photos to post. I don't think I'll be working on the camper in the next month or two because I have to get back to work on the Comet.
ReplyDeleteThat is gorgeous! I have a little Boler, but I always wanted a Shasta! I am awed by your dedication to getting it fixed up! Come visit me at Zootsuitmama and watch my Spring transformation of my little trailer! Zootsuitmama
ReplyDeleteI left for a month and went to Virginia to stay with my Mom.While I was gone the guys bought the trailers and gutted them.They took no photos so I can't show you what it looked like before I got back.I've been taking photos as the work has progressed.Since there are two of us,our trailer has progressed more rapidly than my brother in law's.
ReplyDeleterichmond va foreclosures
I love the way the paint job turned out. I am getting ready to paint my '61 Shasta. Did you use gloss, semi-gloss or flat white as your base paint?
ReplyDeleteThanks Andy. I used gloss white and talked the Home Depot paint person into add tinting to get that shade. But the end result came out flatter than I expected.
ReplyDeleteA little late to the party, but that might not be the original stove. The stoves fit into the space tightly. I have a 66 Shasta Compact that was stripped (best $40 plus tires I ever spent!)and my parents have a 67 that's darn near original. Next summer, we're going to take mine down to the frame and completely rebuild it.
ReplyDeleteActually that brown stove is original to the Shastas, you can find lots of photos of Shasta interiors with the same stove. I did a more recent post about a turquoise stove and sink I found locally which are going in place of the brown stove and white sink. Good luck with your campers!
ReplyDeletehello! i fell in love with these little travel trailers about three weeks ago at the country living fair in rhinebeck, new york ... since then i've been scouring craigslist.com to find one - and i did! drove 4 hours one way today to pick up a 1962 shasta airflyte ... when i got home i noticed to lid to the outside water repository was missing ... i must have lost it along the way because it was there this afternoon when i picked up the trailer ... do you know where i can find this tiny part? thank you ...
ReplyDeletesusan
ps love the blog :)
myeverydayvintage@gmail.com
You may find one on ebay if you kerp looking. Vintage Trailer Supply.com is worth a look too. Good luck!
DeleteHi. I have a '62 Airflyte that looks a lot like yours. We have been camping in it since I got it in 2006. My door is in such bad shape, that I can barely close it...so time to fix it. How did you rebuild your door? Do you have any pictures?
ReplyDeleteThanks, EL
Sorry, I wish I had photos of the door as I rebuilt it. Once you remove the door, disassemble it, take lots of photos and measure the lengths of the frame work and save everything. Buy new wood of the same dimensions, cut and glue/nail/screw the new pieces together. You can do it with some basic tools, just take your time, measure twice, cut once. Good luck.
DeleteWe own a '72 Shasta trailer and although we aren't planning to do a full restoration, we are doing some repair work on a few things. We have a leak coming in our front window and I read somewhere about removing the window and replacing the putty tape. Would you agree with that? We had planned to remove all the caulking and re-caulk but wondering about pulling the window out to get a better seal. Appreciate any insight you have.
ReplyDeleteIt's fairly easy to remove the window. You can get the putty tape online. Pull the window, clean up along the edges, press on the new tape and put the screws back in to reattach the window. Good luck!
DeleteI do not know if this site is still active, but I will ask my question anyway. Yesterday I bought a trailer that looks exactly like yours, but it has no title. The previous owner had been given the trailer, and he said it was a 1966 model Shasta. I believe it to ne like yours entirely. The window to the right of the door is missing; do you have any suggestions for replacement?
ReplyDeleteThanks
If your is rounded (like a canned ham) it is probably no older than a 1964. You can probably get more help from this Shasta forum. http://vintageshasta.proboards.com
DeleteWould you mind sharing where you found your birch panels? I just bought a '63 Airflyte and though I don't have it home yet, I can tell by the photos that at least the bed end has been replaced and painted. I am expecting to have to replace it and don't have any idea how or where to start looking for the birch paneling.
ReplyDeleteI checked all the local lumber and hardware suppliers locally and found a company that mainly supplies building contractors. They do sell to the public so I bought several sheets of 4'x8'x1/8" birch. Call around and check neighboring towns. Good luck!
DeleteIt's a little late for you, but to others out there, the Citrus paint stipper and a pressure washer makes things go MUCH faster. Just be mindful not to wash at full pressure near the joints unless you're planning on a teardown, like this trailer got.
ReplyDeleteI live near Winchester, where did you by the birch?
ReplyDeleteHi,
DeleteAfter I had no luck with Lowes/Home Depot, I checked the yellow pages and called lumber stores, specifying what I wanted, until I found one that carried the birch. Good luck!
Smoot Lumber, Alexandria, VA
ReplyDeleteHey it looks beautiful! Do you have the dimensions of the dinette cushions? I'm in the process of rebuilding and have had no luck finding the specs.
ReplyDeleteSorry, I sold the Shasta earlier this year. You can probably find what you need at this Vintage Shasta Forum - http://vintageshasta.proboards.com/
DeleteWhere do you get replacement parts for these trailers? I just got a canned ham and the aluminum around some of the windows is missing.
ReplyDeleteSome parts are reproduced, some are not. I had good service from vintage trailer supply - Googl it and you'll likely find other options, too. Best thing you can do is find one or more online forums devoted to vintage campers and network with others who can help with questions, finding parts or restoring your old parts. One thing - NEVER throw away an old part during your teardown - it could be repairable, or it could help you visually identify the correct replacement.
Delete