
With a small can of clear, un-tinted glaze you can add a slight haze to clear glass windows and gain some privacy without keeping curtains shut or blinds closed. Other than the glaze, all you need is a clean window and a foam paintbrush.
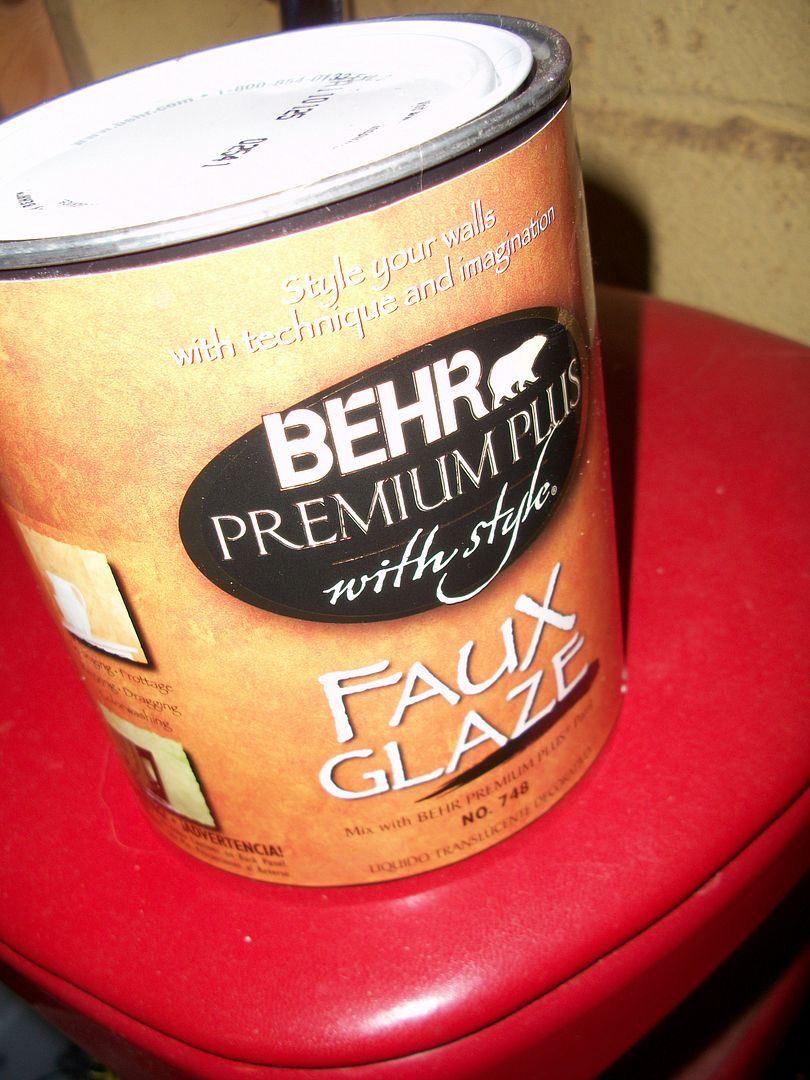
I picked up a quart can of glaze, but it only took a tiny portion of the can to do two bedroom windows, one downstairs bathroom window and the side windows flanking our front door.
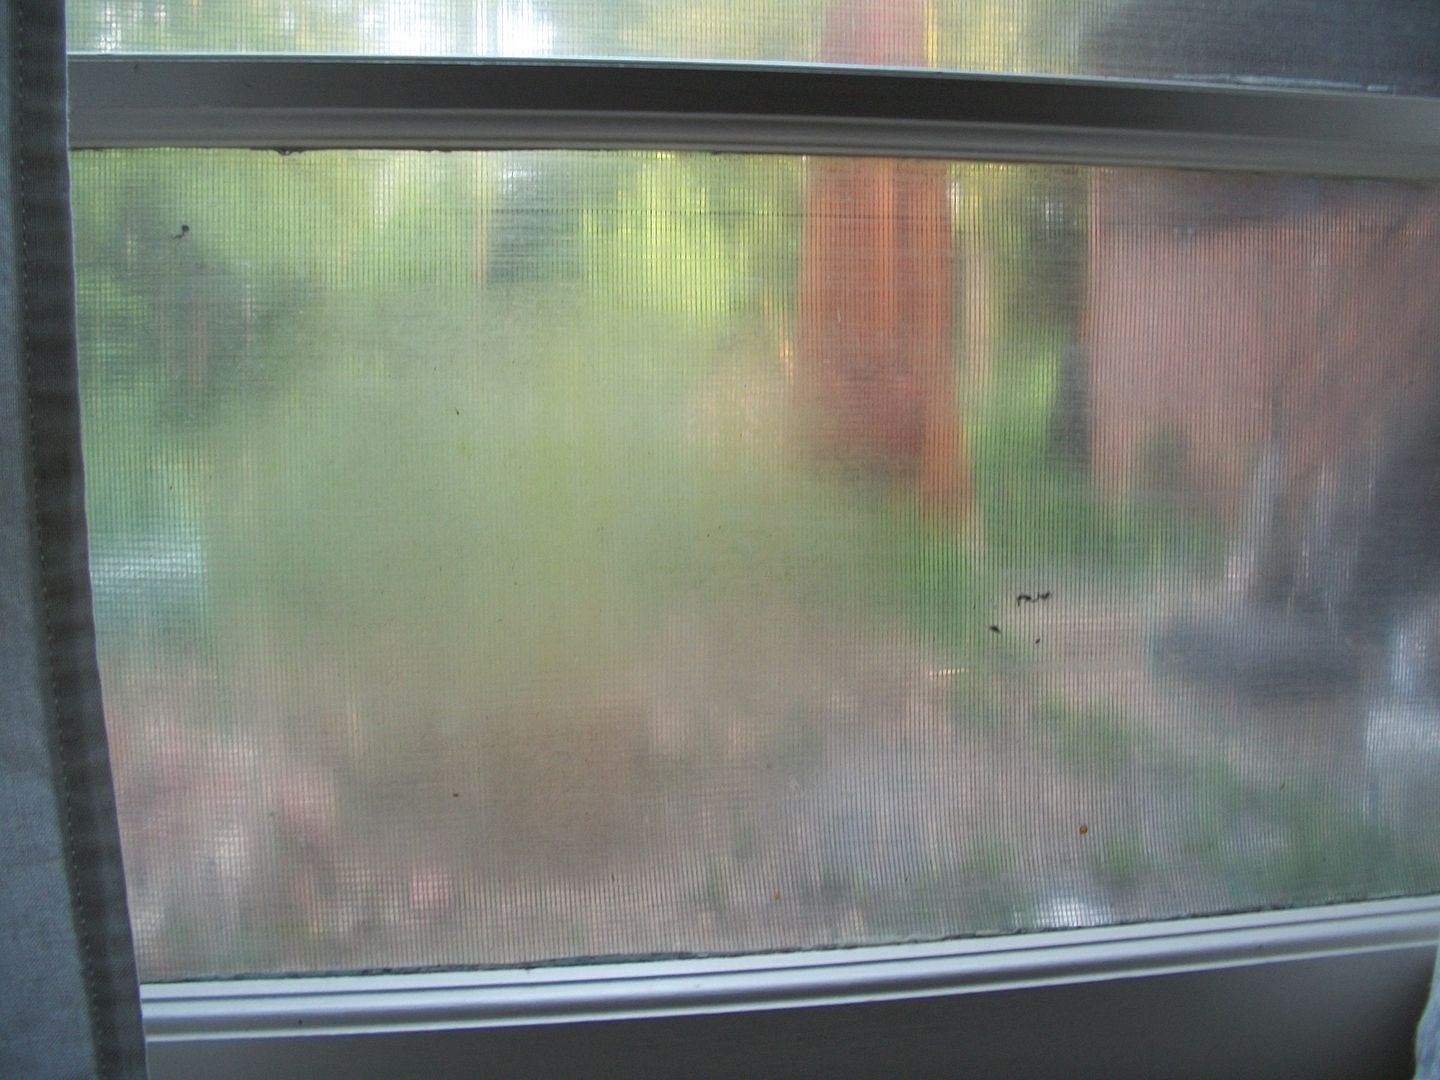
Here's an "After" shot of our downstairs bathroom window - with glazing brushed on. That blurry orange chap in the background is Maynard, our tiki tree stump carving.
Here's the "Before" shot of our front door.

And here's the door after I brushed on some glaze.

This was easy to do and it only took a few minutes. I just brushed in the edges first and then, brushing in only one direction, I did the rest of the window. I only glazed the inside of the window, but you could also do this on the outside if that's easier, although I don't know how well the glaze would hold up when exposed to the weather.
As you can see, the glazing blurs the glass just enough to make it harder to see through but you still get light through the window. This photo shows just two coats of glaze. Another nice benefit, besides being inexpensive, is that if you don't like the results, you can just scrape the stuff off with a razor blade.
As you can see, the glazing blurs the glass just enough to make it harder to see through but you still get light through the window. This photo shows just two coats of glaze. Another nice benefit, besides being inexpensive, is that if you don't like the results, you can just scrape the stuff off with a razor blade.
Now (theoretically speaking of course) the Uncle can walk to the kitchen in his skivvies! Sorry, no pictures of that, this is a family blog.
Bahahah about the skivvies! I like that glaze look. Looks like a good product!
ReplyDeleteInteresting, I would never have thought of that! Cool! We just had to cover some little diamond shaped windows in the front door of my Mom's condo and we used that plastic window cling stuff that looks like obscure glass.
ReplyDeleteYou mean you could do the Risky Business socks n' sunglasses slide through the foyer now? LOL! It turned out pretty good! I like the reversible nature of this DIY too. Good job!
ReplyDeleteHey VC, yeah, I'm liking it so far.
ReplyDeleteSara, I've thought about the sticky plastic stuff but gotta tell ya, I don't care how many people tell me you just spray a little soapy water on then apply the adhesive, I WILL get bubbles no matter how much squeegying I do. I just awful with that kinda thing.
Ha Amber, I'm officially past the sliding in socks phase of life. I really do like how easy this is, and easy to get rid of if we want to.
That is such a nice and practical idea! Thanks for sharing :)
ReplyDeleteI usually use self adhesive frosted paper.