I've been trying to hit the thrift stores more often - maybe that's a bad thing, because I'm dragging more stuff home when I do!
Here's a prime example.
I've seen these online from time to time but I don't know what to call it. It's a combination of painted image and some kind of plastic raised material that gives it a 3-D look. It shows some wear around the off white areas, and it's kinda scratched up.
I did a little searching and turned up a smaller pair of these on that auction site under the term mid century cubist teak wall art. The auction listing is a buy it now for $199. I paid a tiny fraction of that, so I guess I did good. Not sure what I'll do with this yet, it's a little too big and heavy to try and sell online, so I'll probably hold onto it unless I set up at the flea market this summer.
For those who are breathlessly waiting for a kitchen cabinet update, here ya go:
I got the shelves on the other side of the window finished, and did the cabinet faces above the lazy susan area. Ran out of gas working on the doors so three are still in stages of paint removal. I knew I would get sick of this job, but I'll keep pushing myself to get it done. I've got a total of eight doors to do yet.
Showing posts with label teak. Show all posts
Sunday, March 18, 2012
Sunday, July 31, 2011
A real hep cat
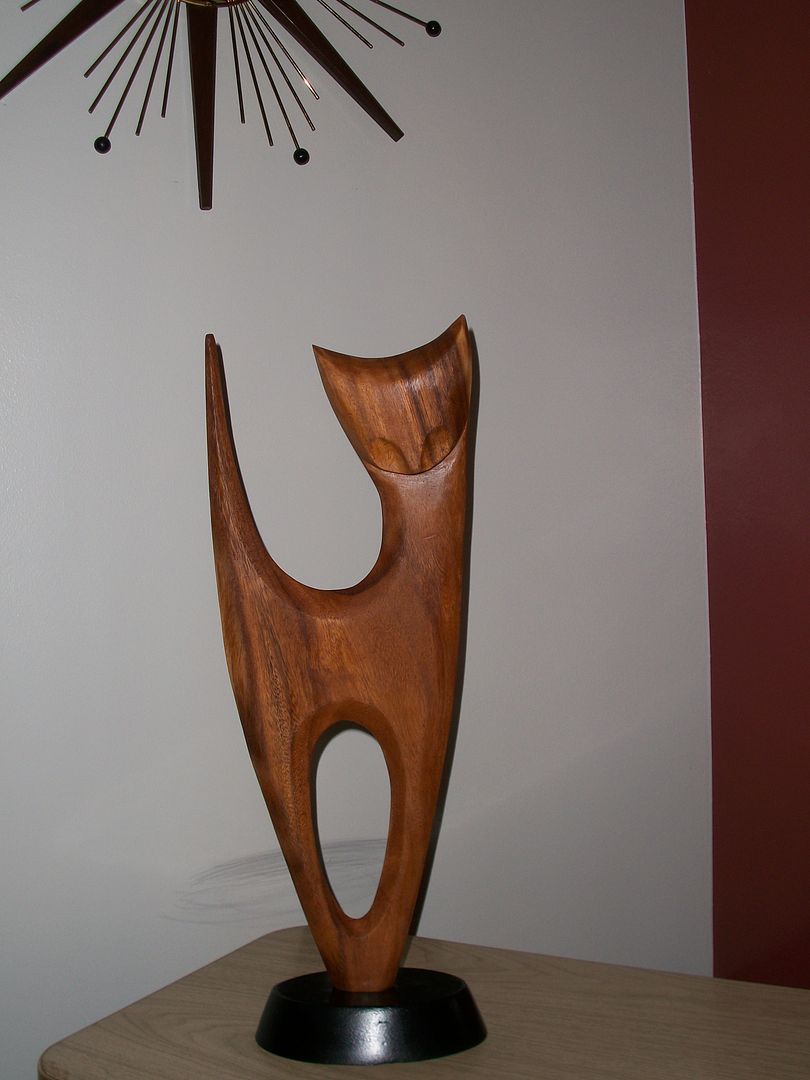
Lately I've been hitting the local thrift shops. Pickings haven't been great, but I have found a few things. So yesterday, I scooped up this wooden cat for $8. It stands almost two feet tall.
It was worn and scratched and dinged, but for the price I knew I could give it new life.
First I needed to get the base off. It had a single flathead screw and the screw was rusty and wouldn't come out. The base was not tight so with a few turns I had the base and cat separated, but the screw was still stuck in the base. After I broke the screw tip off while trying to turn it out with vise grips, I tried hammering it out with a steel punch. That did the trick.
I sanded, primed, and painted the base with black spray paint.
While waiting for the primer to dry on the base, I used 100 grit sandpaper to knock down the scratches on the cat, and got most of the dings out too. Then I used 150 and 220 grit sandpaper to smooth out the wood some more. Next I wiped the wood down with some Old English cleaner.
By this time the primer on the base had dried, so I hit it with some leftover gloss black paint.
Once the Old English dried I still wasn't happy with the finish on the cat, so using an old cotton T-shirt I wiped on a couple of coats of tung oil.
I think the tung oil makes it look good.
The last step was to find a replacement for the rusty screw. I found one that was a little bigger than the old screw because I wanted something that would hold tight in the hole.
So here's the finished product. This hep cat should be good for quite a few more years now.
Does anyone know who made this?
Subscribe to:
Posts (Atom)