
This year I managed to get a little work done on it, but not as much as I wanted to - it's still not drivable. Anyway, even though I forgot to shoot progress photos of this restoration, I thought I'd describe how I restored the steering wheel.
Here's a Before shot - faded, with a lot of little hairline cracks and some bigger cracks. These wheels were pretty common across the Ford and Mercury car and truck line for 1963 and several years in that era. If you zoom in on the photo, you can make out some of the cracking on the wheel. That chrome horn ring will also get replaced by a nice one I found online.
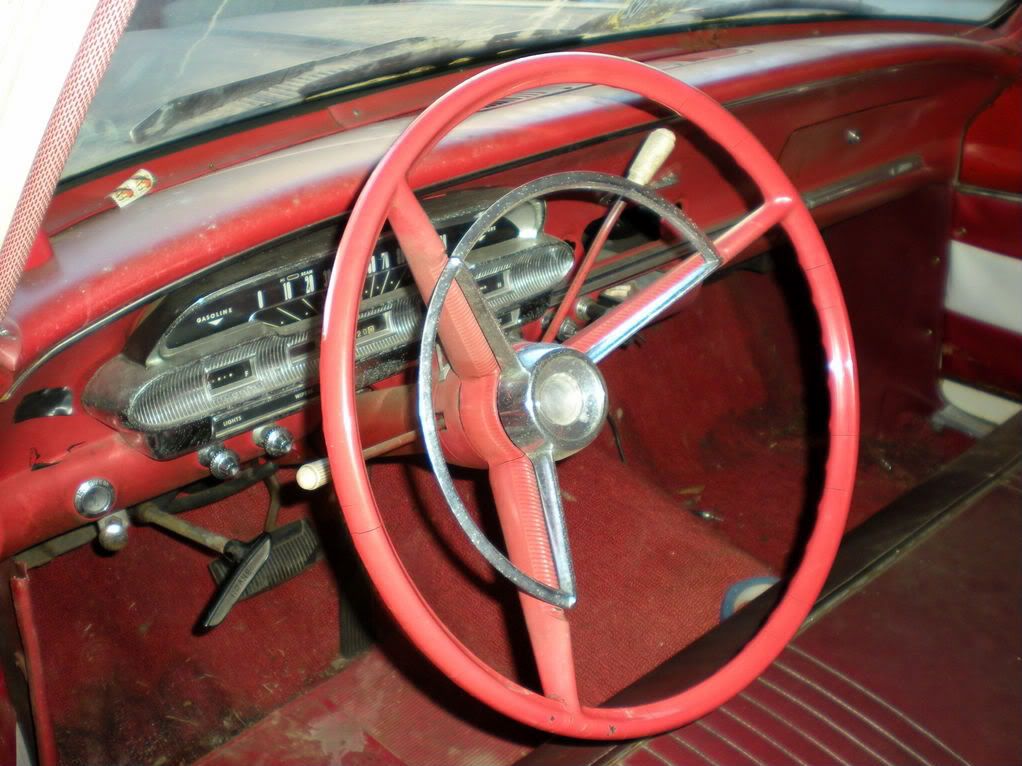
These wheels were usually made of either hard rubber or plastic. As far as I know, the Comet wheel is some form of plastic. There's at least one kit you can buy to restore an old steering wheel, but I had read of some people who had used a product called JB Weld, a two part epoxy that farmers use a lot. It hardens well but you can carve and sand it. So I set out to get the wheel ready and use the JB Weld as filler for the cracks.
I didn't shoot photos of the actual restoration, but here's what I did:
1. I used a utility knife and a Dremel tool with a grinding tip to cut a V-shape into the cracks, so the epoxy would have something to stick to.
2. I mixed the two-part epoxy and used popsicle sticks to spread it into the cracks. Wearing disposable latex gloves, I worked the epoxy into the grooves. Then I let it set up and harden overnight. I did this in stages, working around the back side of the wheel, then the front side.
3. I used a rounded metal file to knock down the excess epoxy, then used different levels of sandpaper to smooth out the epoxied areas. The wheel has the ridges on the back that give your fingers a comfortable grip. Those made it challenging when it came to filing and sanding the excess away, but persistence pays off. I did a little, and if I got tired, I set it aside and went back to it the next night. Overall, I probably spent about 20 minutes a night for about two weeks gradually building up and sanding away the filler to get close to an original feel. I used 80 grit coarse sandpaper to start, then progressed to 200- and 400-grit paper to get things smooth again. At that point, the wheel looked mighty ugly, a mixture of black, gray, and faded red.
4. Once I had the fine sanding done, I used a standard spray can primer to go over the whole wheel, front and back. I let that dry well, then I used a standard bright red spray can paint formulated for painting plastic, and gave the wheel several light coats of paint. I used some very fine (1000 grit) automotive wet sanding paper to go over the whole wheel to knock down any rough spots and smooth out minor paint runs (I always get paint runs, no matter how careful I am!)
5. At this point, I had a wheel that looked nearly new. I had found a very nice original chrome horn ring with the Mercury Man center to replace the dull, pitted old ring that was on the wheel.
6. I could have called it done, but I came across a bright red leather wheel cover kit and decided to give that a try. The leather part goes over the outside of the wheel, and the inside of the leather has perforated holes. You use the waxy cord that comes with the leather and you weave it through the holes in the pattern laid out in the instructions. As long as you continually pull the cord tight as you're weaving, it goes smoothly. That's another one of those jobs where a third hand would be useful, but overall not too hard.
Anyway, to end my lame photo-less how to post, here's the final product:

Thanks for reading this post, maybe it will help someone else. I have a few more parts car steering wheels laying around, so I promise if I do this again, I'll shoot more photos! Part of my reason for posting about the Comet is to get my motivation back to do some more indoor work on it until Spring rolls around. Then it will be time to replace the gas tank and sending unit and rebuild the carburetor. If I'm lucky, at that point I'll have it far enough along to drive a little.
Sweet Post! My Dart wagon is a '63 too! I had a '63 Dart 4 door before the wagon, and did a steering wheel restoration on it. If I recall, I used Bondo to fill in and sand the cracks. Then it got a good coat of teal paint. It looked pretty darn good! In my wagon, the steering wheel is almost void of any original paint. I don't want to restore it though because it has such a nice feel to it, like mahogany...even though it some weird plastic compound. I just love thinking about all the times someones fingers let the wheel slide trough them in a turn. Its so nostalgic! My only compliant is that in damp weather, the plastic seems to get sticky and I have to wear gloves or else I'm covered in the black goo. Luck for me its not usually damp here in So-Cal! Someday I'll make a post of my wagon and we can nerd out together!
ReplyDeleteYour wagon is looking pretty good! Steering wheels often get neglected, but its the part of any car that a person sees the most. Nice to see you working on it.
ReplyDeleteDon
I've enjoyed reading your blog posts about your Dart wagon Amber. In college I drove a 4 door 63 Dart. I've been lusting over a 63 Dart convertible that's been on the local craigslist, but I really cannot add another car to the driveway.
ReplyDeleteRanchwagon, thanks for the encouragement. I don't think I'll get much more done on the Comet until spring, but I hope to sort out my drivetrain and have it running by late spring.
Your wagon looks nice! I love reading your post, this would be a great help to someone else.
ReplyDelete