I've never cared for the address numbers in front of our house - they're boring.
And they're kinda hidden behind the porch light - which also is boring (I'm on the lookout for a replacement light). So when I needed to take a break this week from the patio wall footer forms I'm breaking my back building, I finally figured out what I wanted to do for a street address sign.
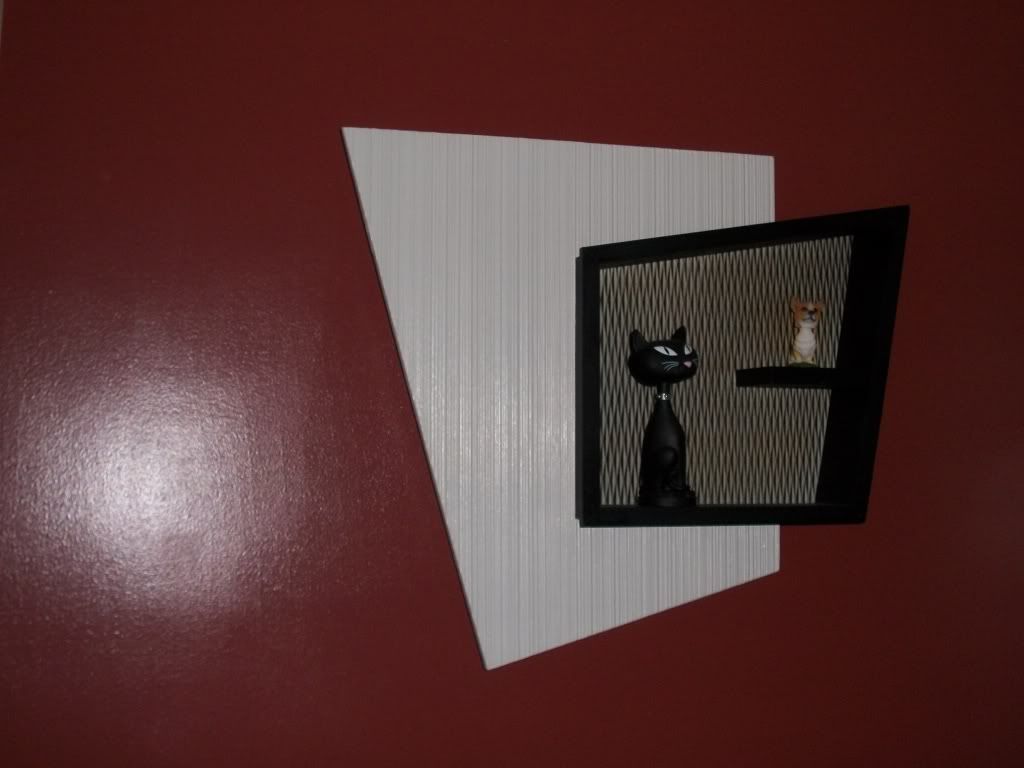
I took my inspiration from the small shadow box you see in at the top of this blog.
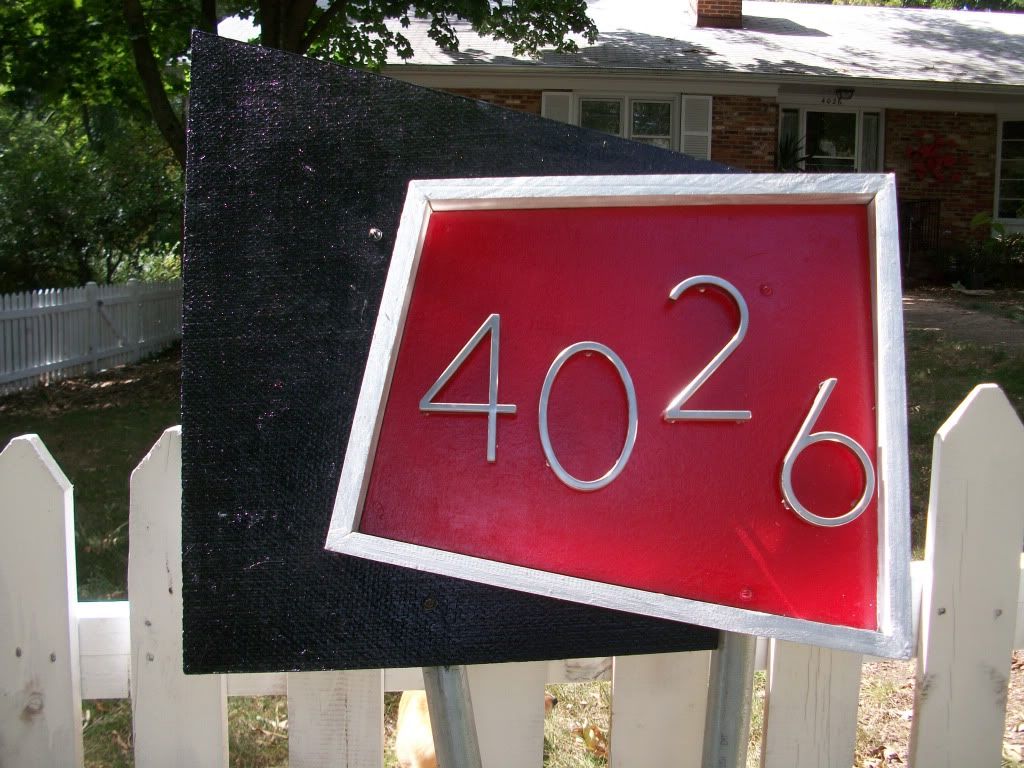
So what I needed was the right materials to use outdoors. I had a piece of cement backer board, the kind of material you use in a bathroom remodel. The numbers are from a big box store. I liked them because you can mount them flush or have them float.
I wasn't sure how big to make the shadow box, so I worked backward from the numbers - I knew I needed enough room to mount four numbers, so I established that minimum width and then started measuring and drawing pencil lines on the cement board.
I have a miter saw and a table saw, so I figured I could use one or the other to cut angles to frame the address area with some treated pine. For paint, I used some leftover Rustoleum gloss red and black, and bought a can of silver. I did the best I could with cutting the angles for the frame, but it was tough because a couple angles needed to be greater than 45 degrees, and that's the limit for the blade adjustment. Cutting angles has always been the hardest thing for me, but this time I got them close and used some plastic wood patch to fill in where I ended up with gaps where the angles meet.
Once I had the two pieces of cement board cut I painted them. After they were dry, I used some small nails to attach the two pieces together. (I flipped the red piece after I shot this photo, as you'll see below)
Then I glued the pieces of the frame together and glued them down to the cement board too. Using a small drill bit, I carefully drilled starter holes in the corners of the frame and tapped in some more small nails to hold the frame together.
Next I figured out how long I need to make the 1 1/2 inch conduit pipe, and I cut those pieces. Then I decided where I would attach the pipe to the sign and marked the pipe. Using my drill press, I drilled holes through the pipe pieces - I had already bought some bolts long enough to go through the pipe and the cement board, so next I lined the pipe up behind the shadow box and drilled through the holes in the pipe to get the holes exactly where I needed them through the cement board.
At first I figured I would orient the pipes so they were parallel, but then I realized it would look much better with them angled.
Once I got the pipes mounted to the shadow box, I needed to do some touch up with the paint to cover the bolt heads and some other areas on the front of the sign that needed touching up.
Finally, I was ready to put the numbers on the sign. They lined up pretty easily, so next I drilled small holes to float the numbers inside the framed area. The directions said to use clear caulk to hold the numbers in the holes, but after the caulk dried I knew I had to do something more to make sure the numbers would stay in place. I used some epoxy and some washers and that seems to have done the job. (As you can see in the photo, I still need to use some silver to cover up the black epoxy, just because it will drive me nuts to look at the back of the sign from the house and see those black dots there!).
The only thing I didn't get done was to run a piece of aluminum channel around the edge of the black area. The cement board is 3/8 inch thick, and I found a piece of 3/8 inch aluminum channel which I planned to cut and bend around the corners of the black area, but the channel would not squeeze onto the cement board and I didn't want to force it. So I'll keep an eye out for wider channel, or another solution to give the black area a slightly more finished look.
It's not a blinking, neon, Googie sign, but SWMBO already told me no neon, so this will have to do ;-)
I went back to the big box store and bought three 80 pound bags of concrete mix, and I also discovered a piece of J-channel flashing with a 3/8 inch gap, so with tin snips I fitted the J-channel around the black part of the sign and tacked it on with a couple of tiny nails. I think I'll also drill a couple of holes up from the bottom of the wood shadow frame's bottom piece so that snow/ice will have a way to not build up in the frame and hasten the wood rot process I know I'll have to eventually deal with.
With the help of a big iron digging bar, I got down far enough to position the sign and add concrete mix and water. The toughest part was leveling it - with all the angles, the only "level" element was the bottom of the numbers, so I went by that. The concrete set up overnight so I removed the wooden braces and stakes I had to hold it steady, and covered the top of the hole with dirt. It's rainy this morning so I didn't get a great photo, but I'll shoot some more when things brighten up.
I have to say, while it's not perfect, I'm mighty happy with the way this project turned out. I'll have to wait and see how the shadow box holds up after it endures rain, ice, snow, and sunlight.


Horrible! NOT!
ReplyDeleteWow, you are talented! I just paid to have someone make numbers for my house (which haven't been put up because we haven't painted yet), and while cool, nowhere NEAR as cool as yours! I love it!!
Now THAT'S thinking!!! This look is perfecto! Bravo! Pam @ Sallygoodin
ReplyDeleteI adore it!! You did a great job!! And now the pizza guy will FORSURE FIND YOU GUYS!! *lol*
ReplyDeleteGreat idea! I love your choice of colors. So many projects, so little time...it's wonderful when it actually turns out as great as you imagined it would. Sorry about the hard dirt but I hope you finish it soon and post the "installed" photo.
ReplyDeleteI love this, if only it would work with the house I live in I would do it in a shot!
ReplyDeleteThanks for the comments, it was definitely a fun project. Now I wait to get the neighbors' reactions. The neighborhood has an annual block picnic in October, and I suppose we'll hear some positive comments.
ReplyDeleteNice! It looks wonderful from start to finish, a very crafty project! If you can't have neon, could you at least put a little light in there to illuminate it at night? That way the pizza boy can find your house :-)
ReplyDeleteI love this project. I love the way you used materials that so closely resemble an original piece like this from the past. So much of it seems to have a hand crafted look and not cheaply mass produced like the stuff we see today. I have so many ideas in my head also about how to go about replicating the stuff I see. I'm totally into circles right now and have killed my drill by using various hole saw bits. We just finished room dividing planters using the shadow box circle effect.
ReplyDeleteLove your ideas! Mind if I steal?
Thanks for the compliments. Please feel free to steal ideas all you want, that's why I'm posting. I'd like to see those dividing planters you're talking about.
ReplyDelete